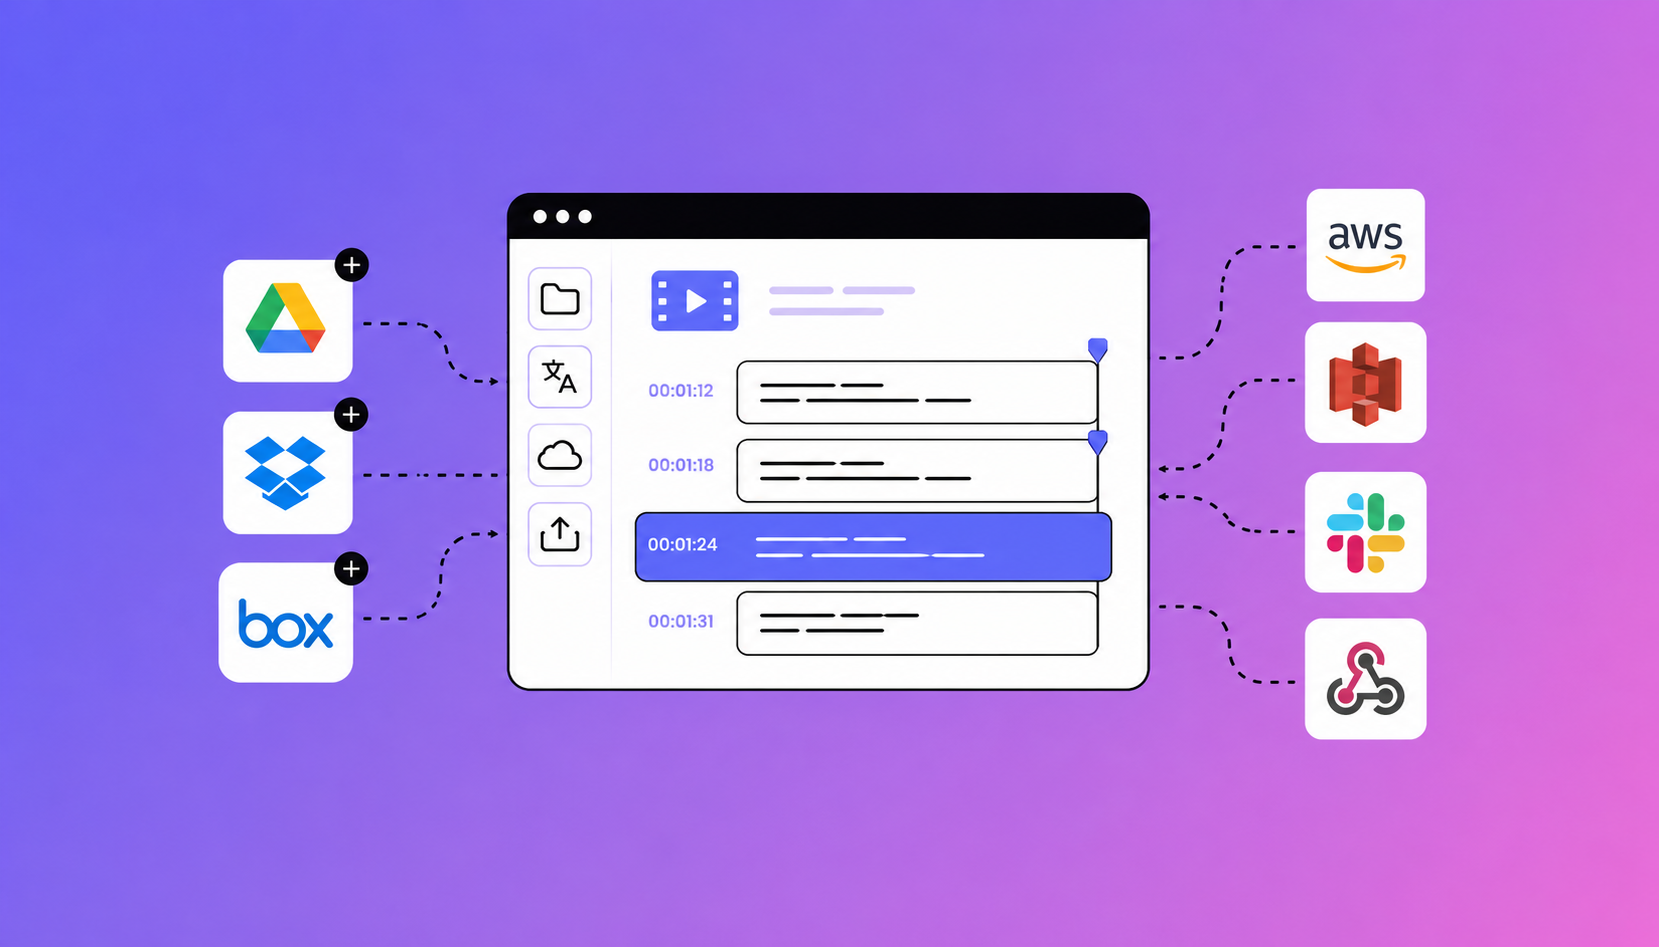
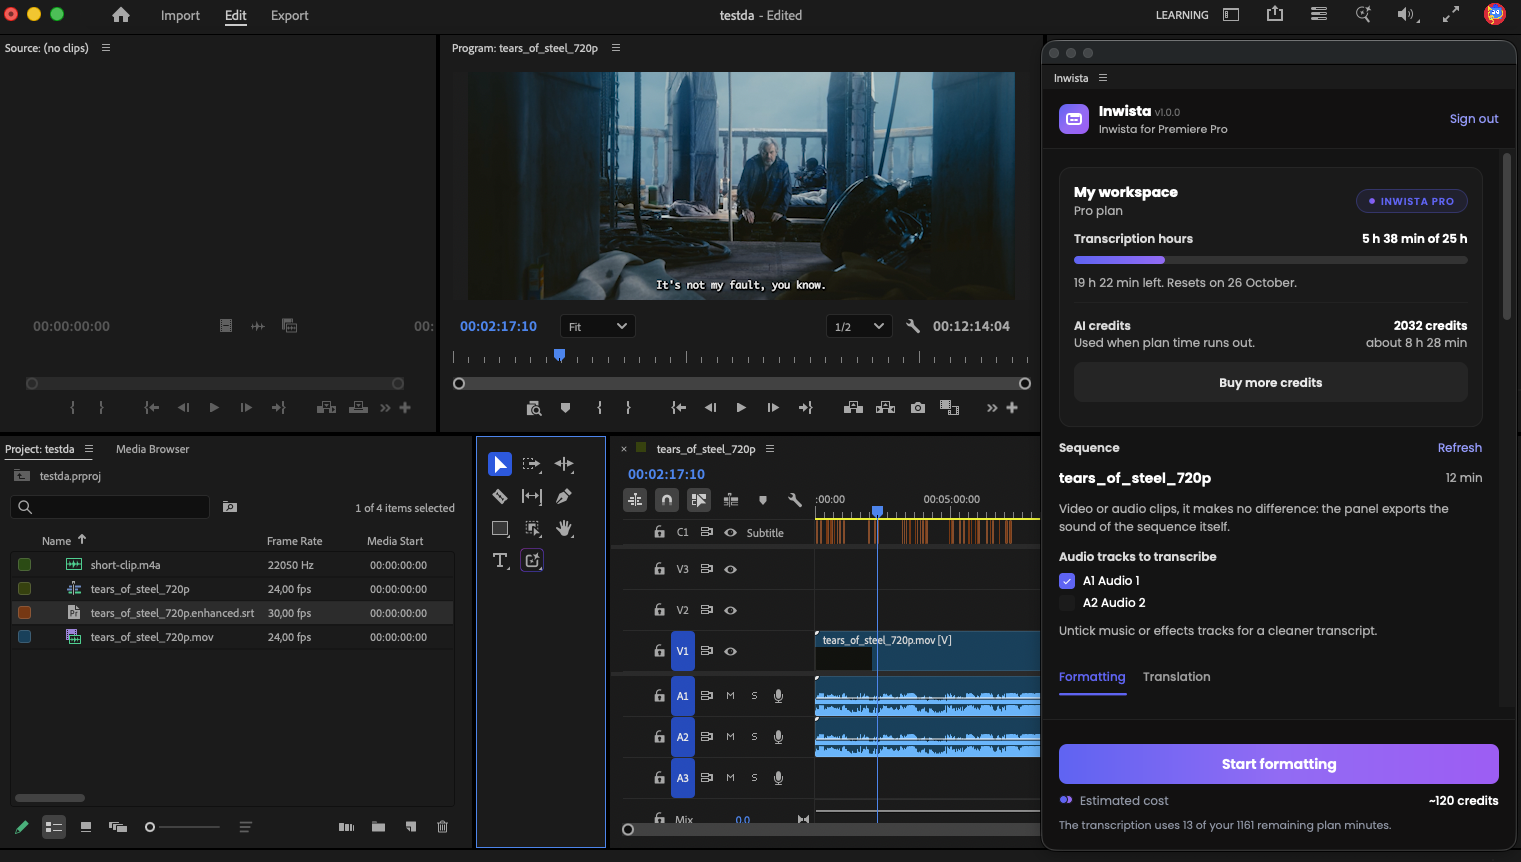
Inwista is now available on Adobe Exchange as Inwista Subtitles for Adobe Premiere Pro. It is a free panel that sends the audio of your sequence to Inwista, turns it into subtitles in 70+ languages, formats them to broadcast rules and puts them back on your timeline. If you want, it translates them as well.
This guide walks through everything from the first install to your first translated caption track. Every step has a screenshot, so you can follow along with Premiere Pro open next to it.
Looking for a reference page instead of a walkthrough? The help center guide covers every setting in the panel.
Before you start
- Premiere Pro 25.6 or later on macOS or Windows.
- An Inwista account. You can create one for free. The Free plan includes 45 minutes of transcription every month and needs no card.
- An administrator of your workspace to approve the connection. If you created the account yourself, that is you.
Step 1. Install the panel
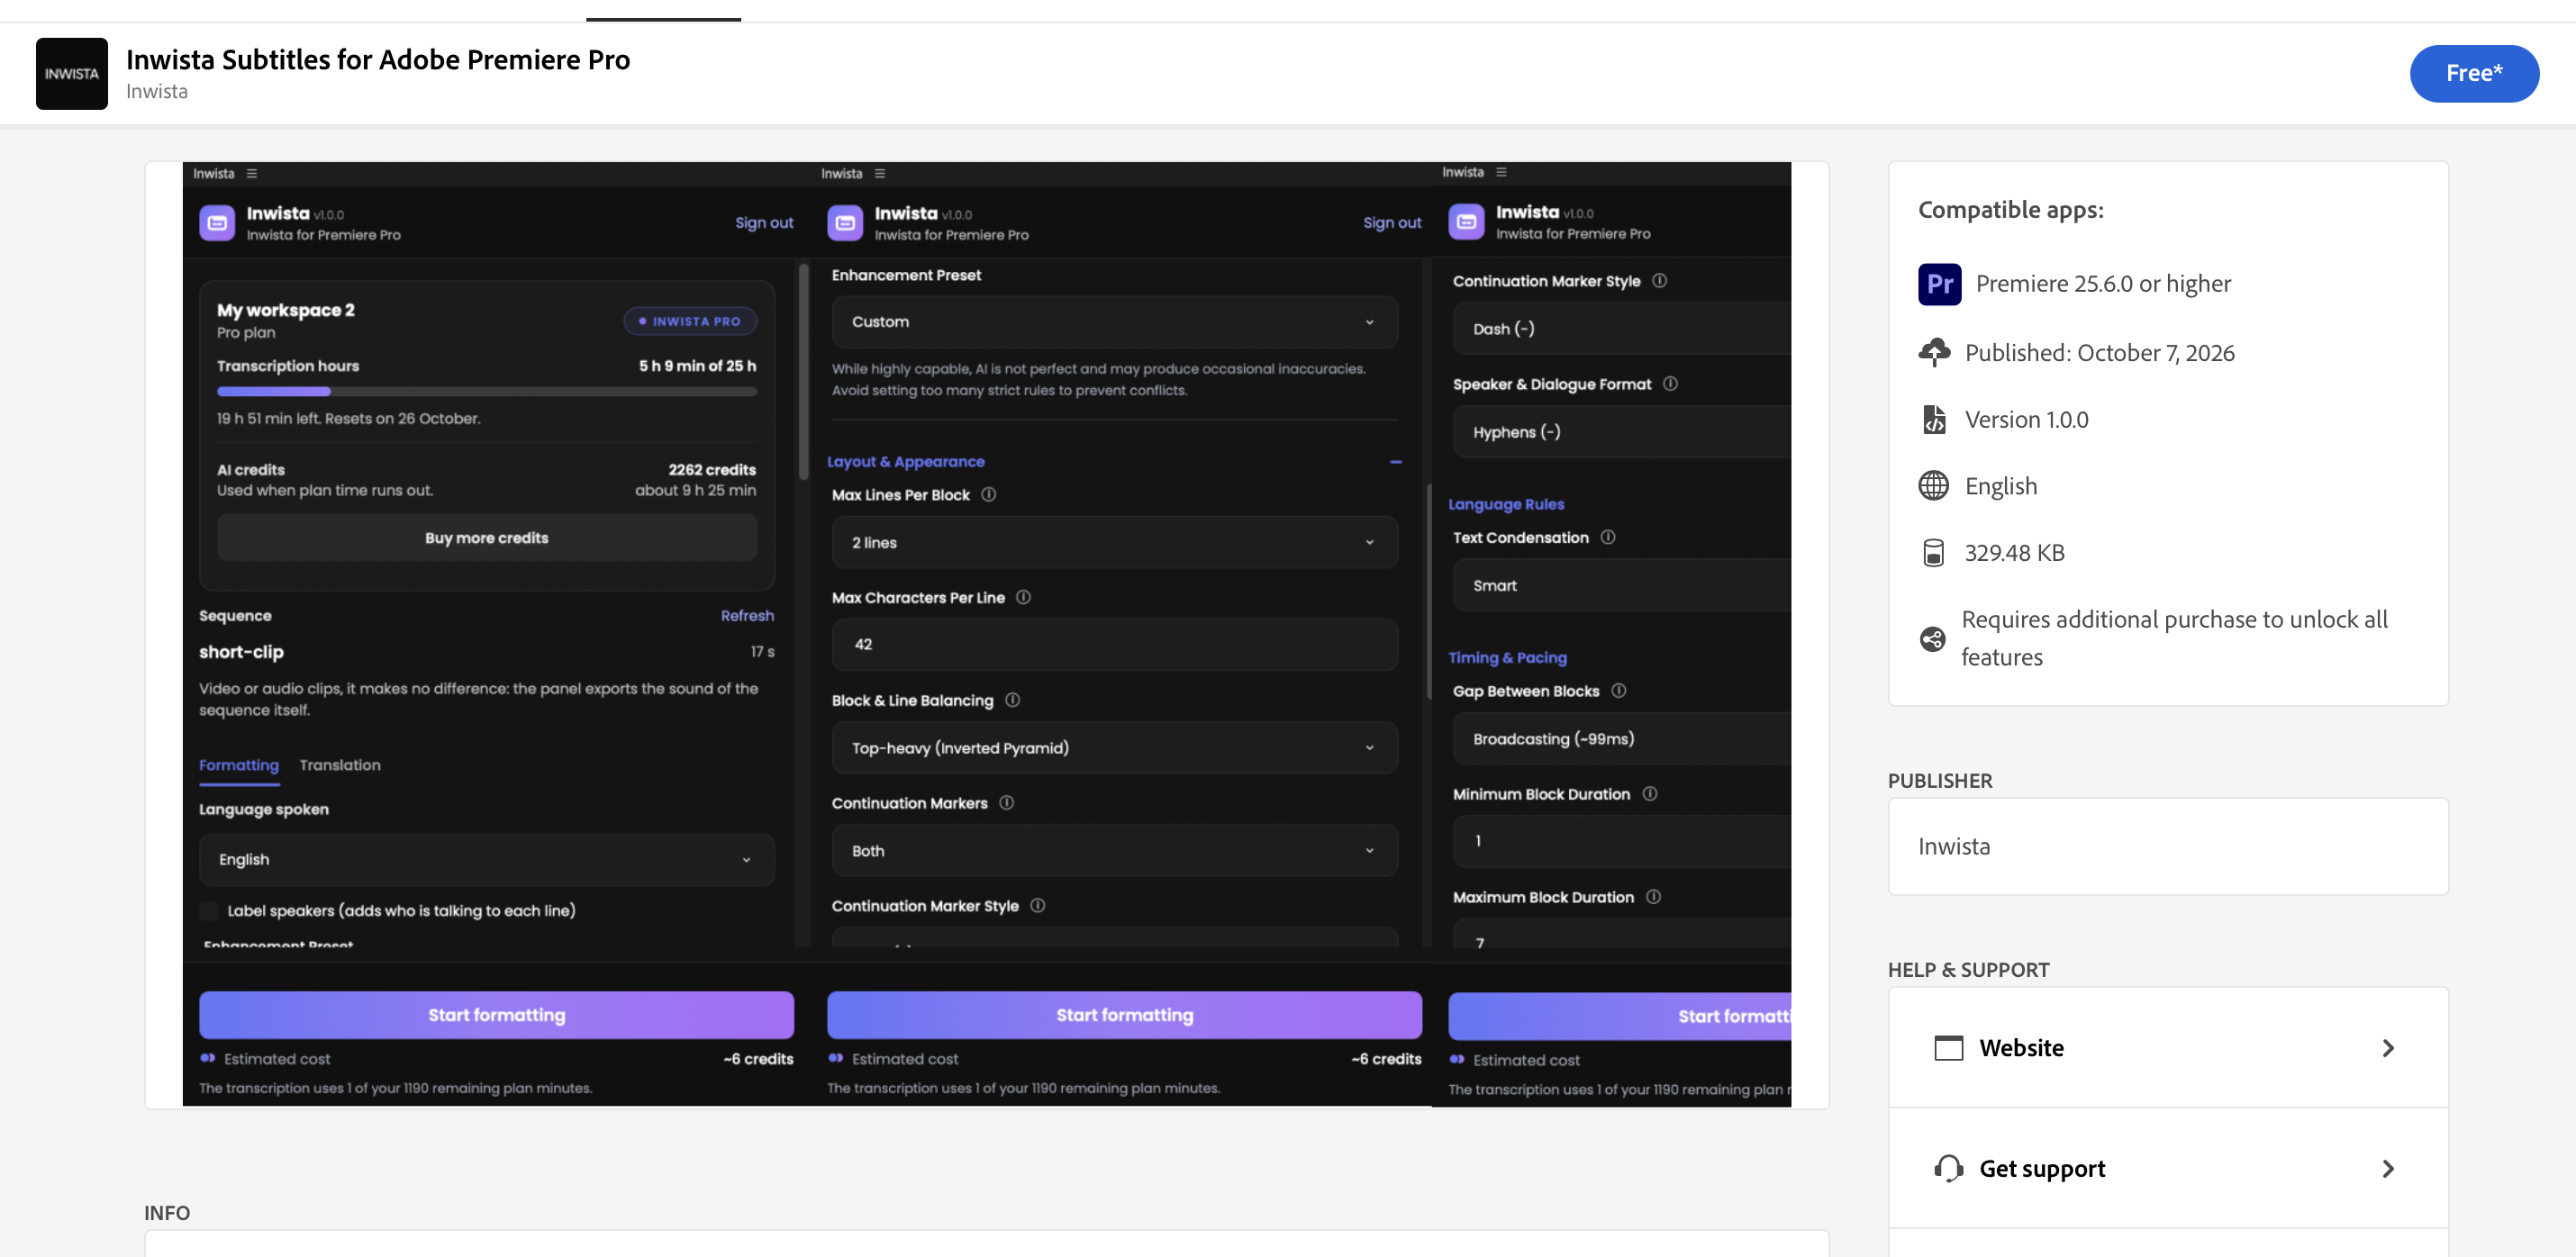
Open the Inwista listing on Adobe Exchange and click the Free button. Sign in with your Adobe ID if you are asked to, and the Creative Cloud desktop app installs the panel. You can also do it all from the Creative Cloud app: go to Stock & Marketplace, choose Plugins, search for Inwista and click Get.
Step 2. Open the panel in Premiere Pro
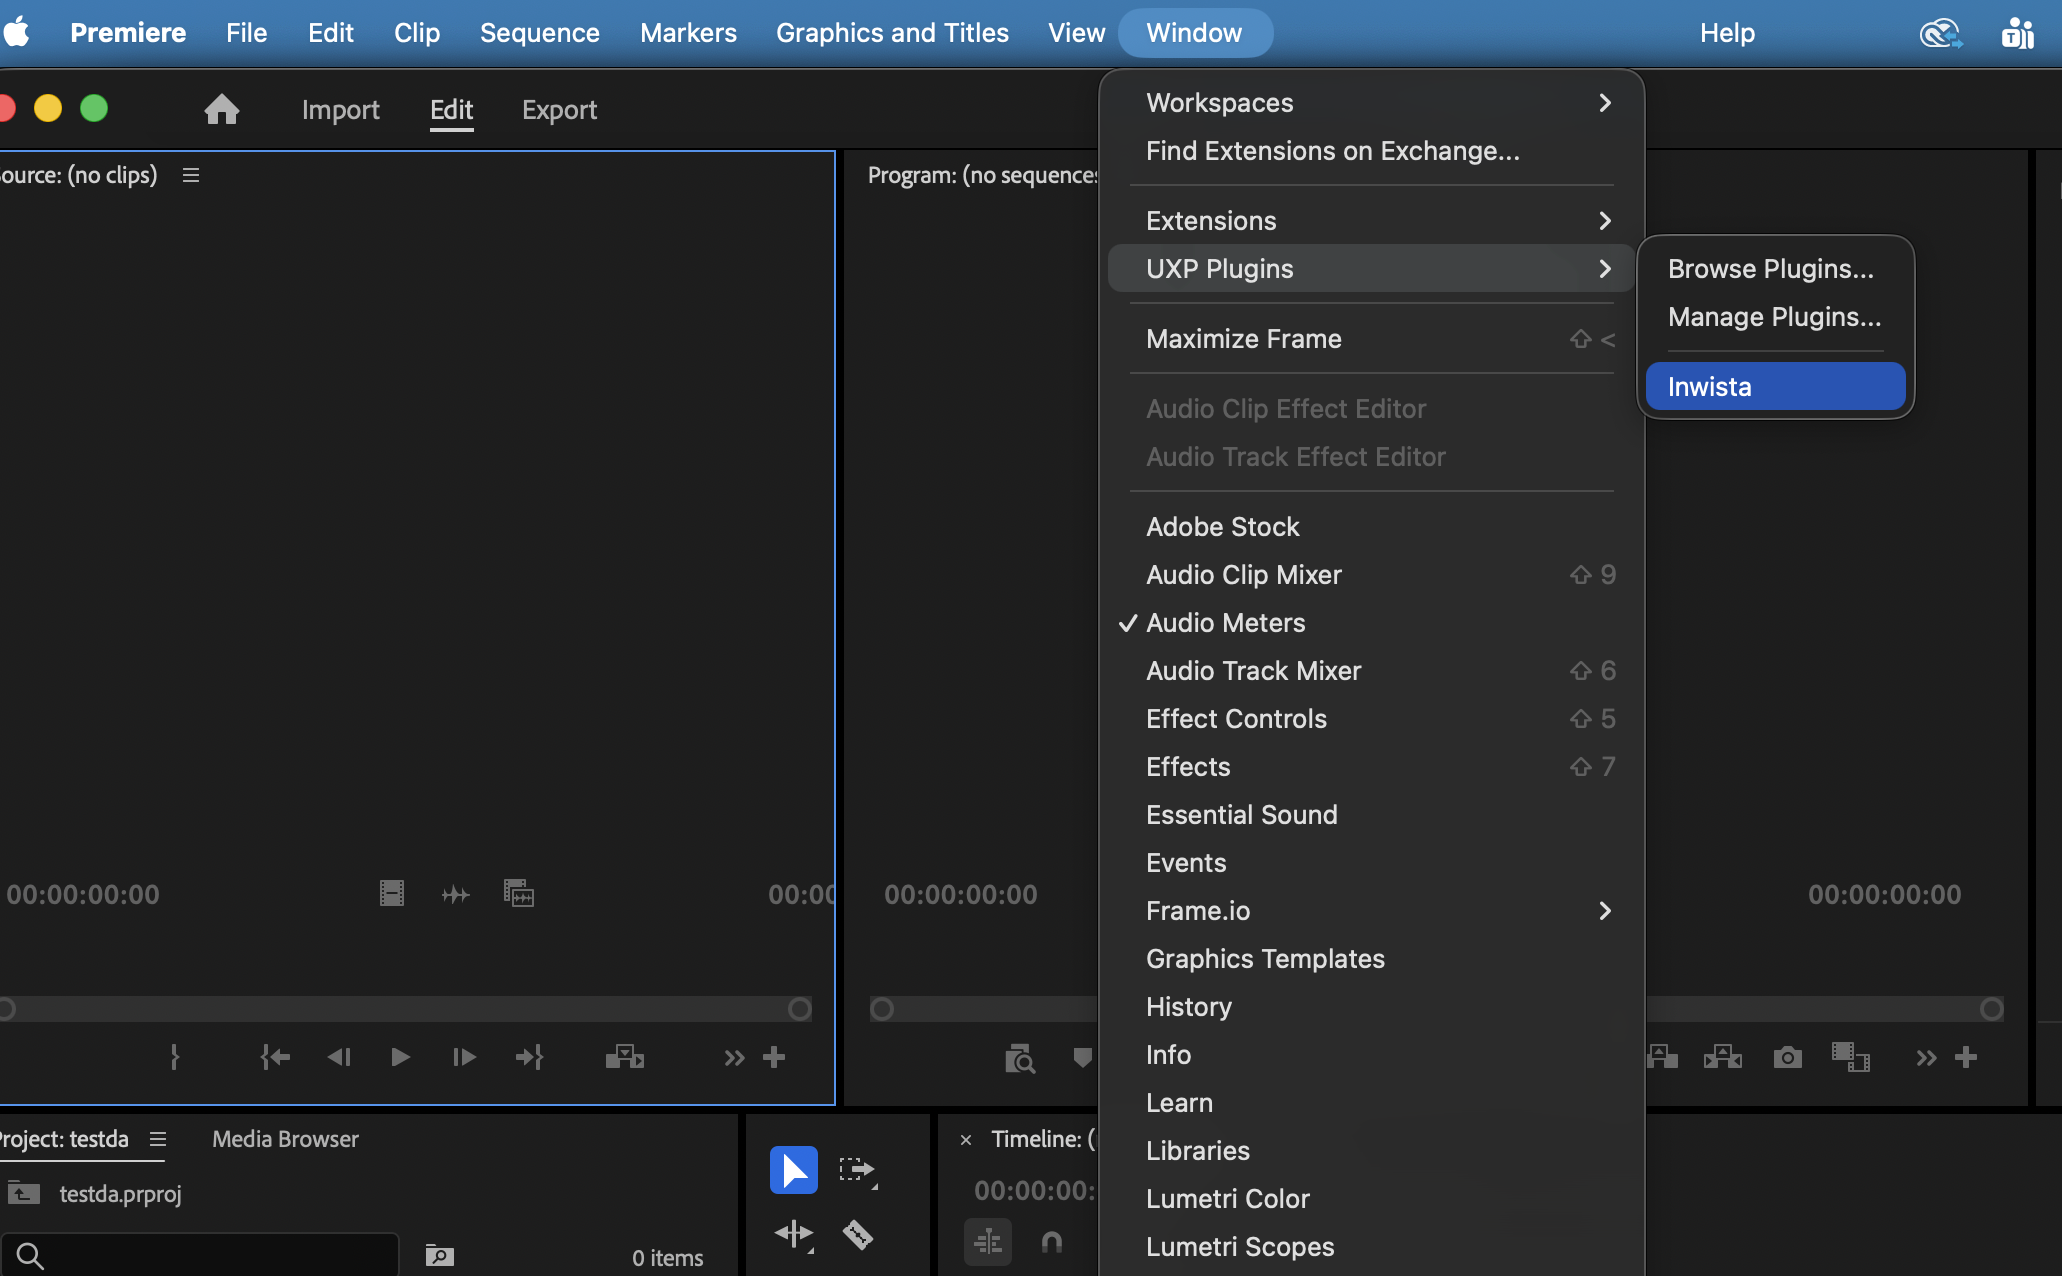
In Premiere Pro, choose Window > UXP Plugins > Inwista. The panel docks like any other panel. It needs about 530 pixels of width, so give it a column of its own or let it float.
Don't see it in the menu? Restart Premiere Pro. A newly installed panel shows up the next time the app starts.
Step 3. Sign in with a code
You never type your password into the panel. Instead, you approve the connection in your browser:
- Click Sign in with Inwista. The panel shows a short code, four letters and four digits, for example KXRT 4829.
- Your browser opens inwista.ai/connect with the code already filled in. Log in if you are asked to.
- Check that the code on the page matches the one in the panel.
- Choose the workspace Premiere Pro should use and click Connect.
The panel notices within a few seconds, and you can close the browser tab.
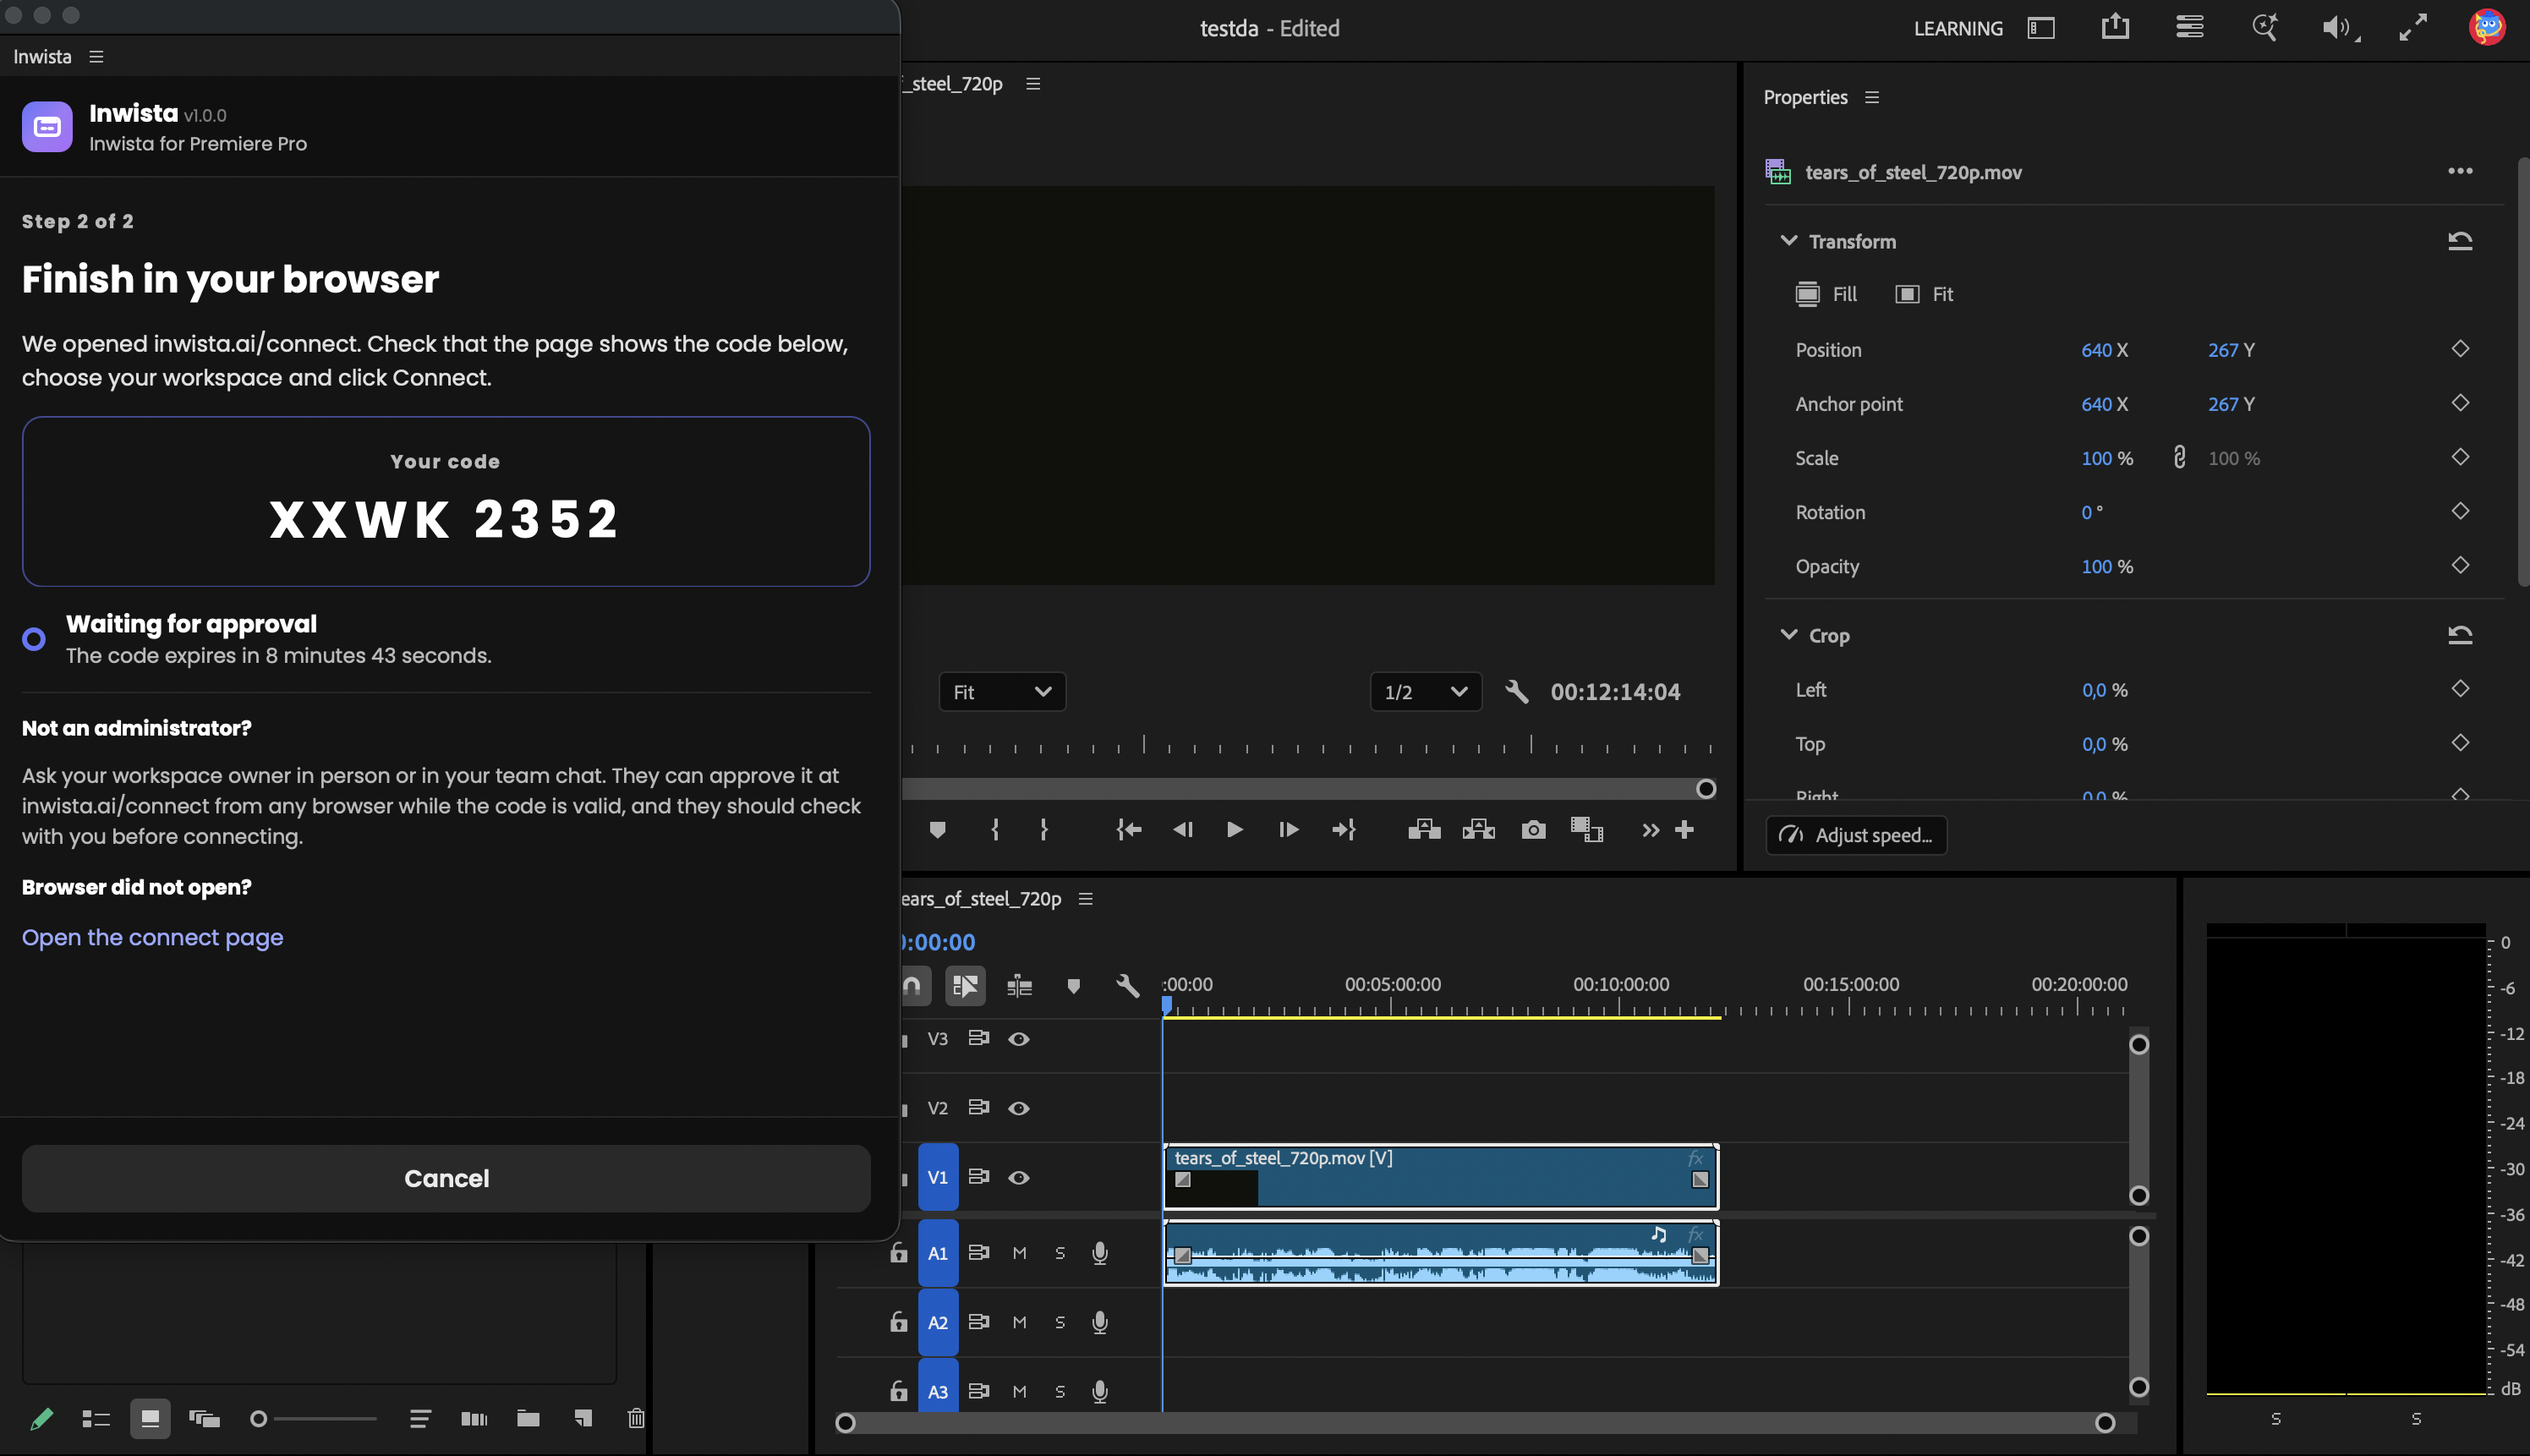
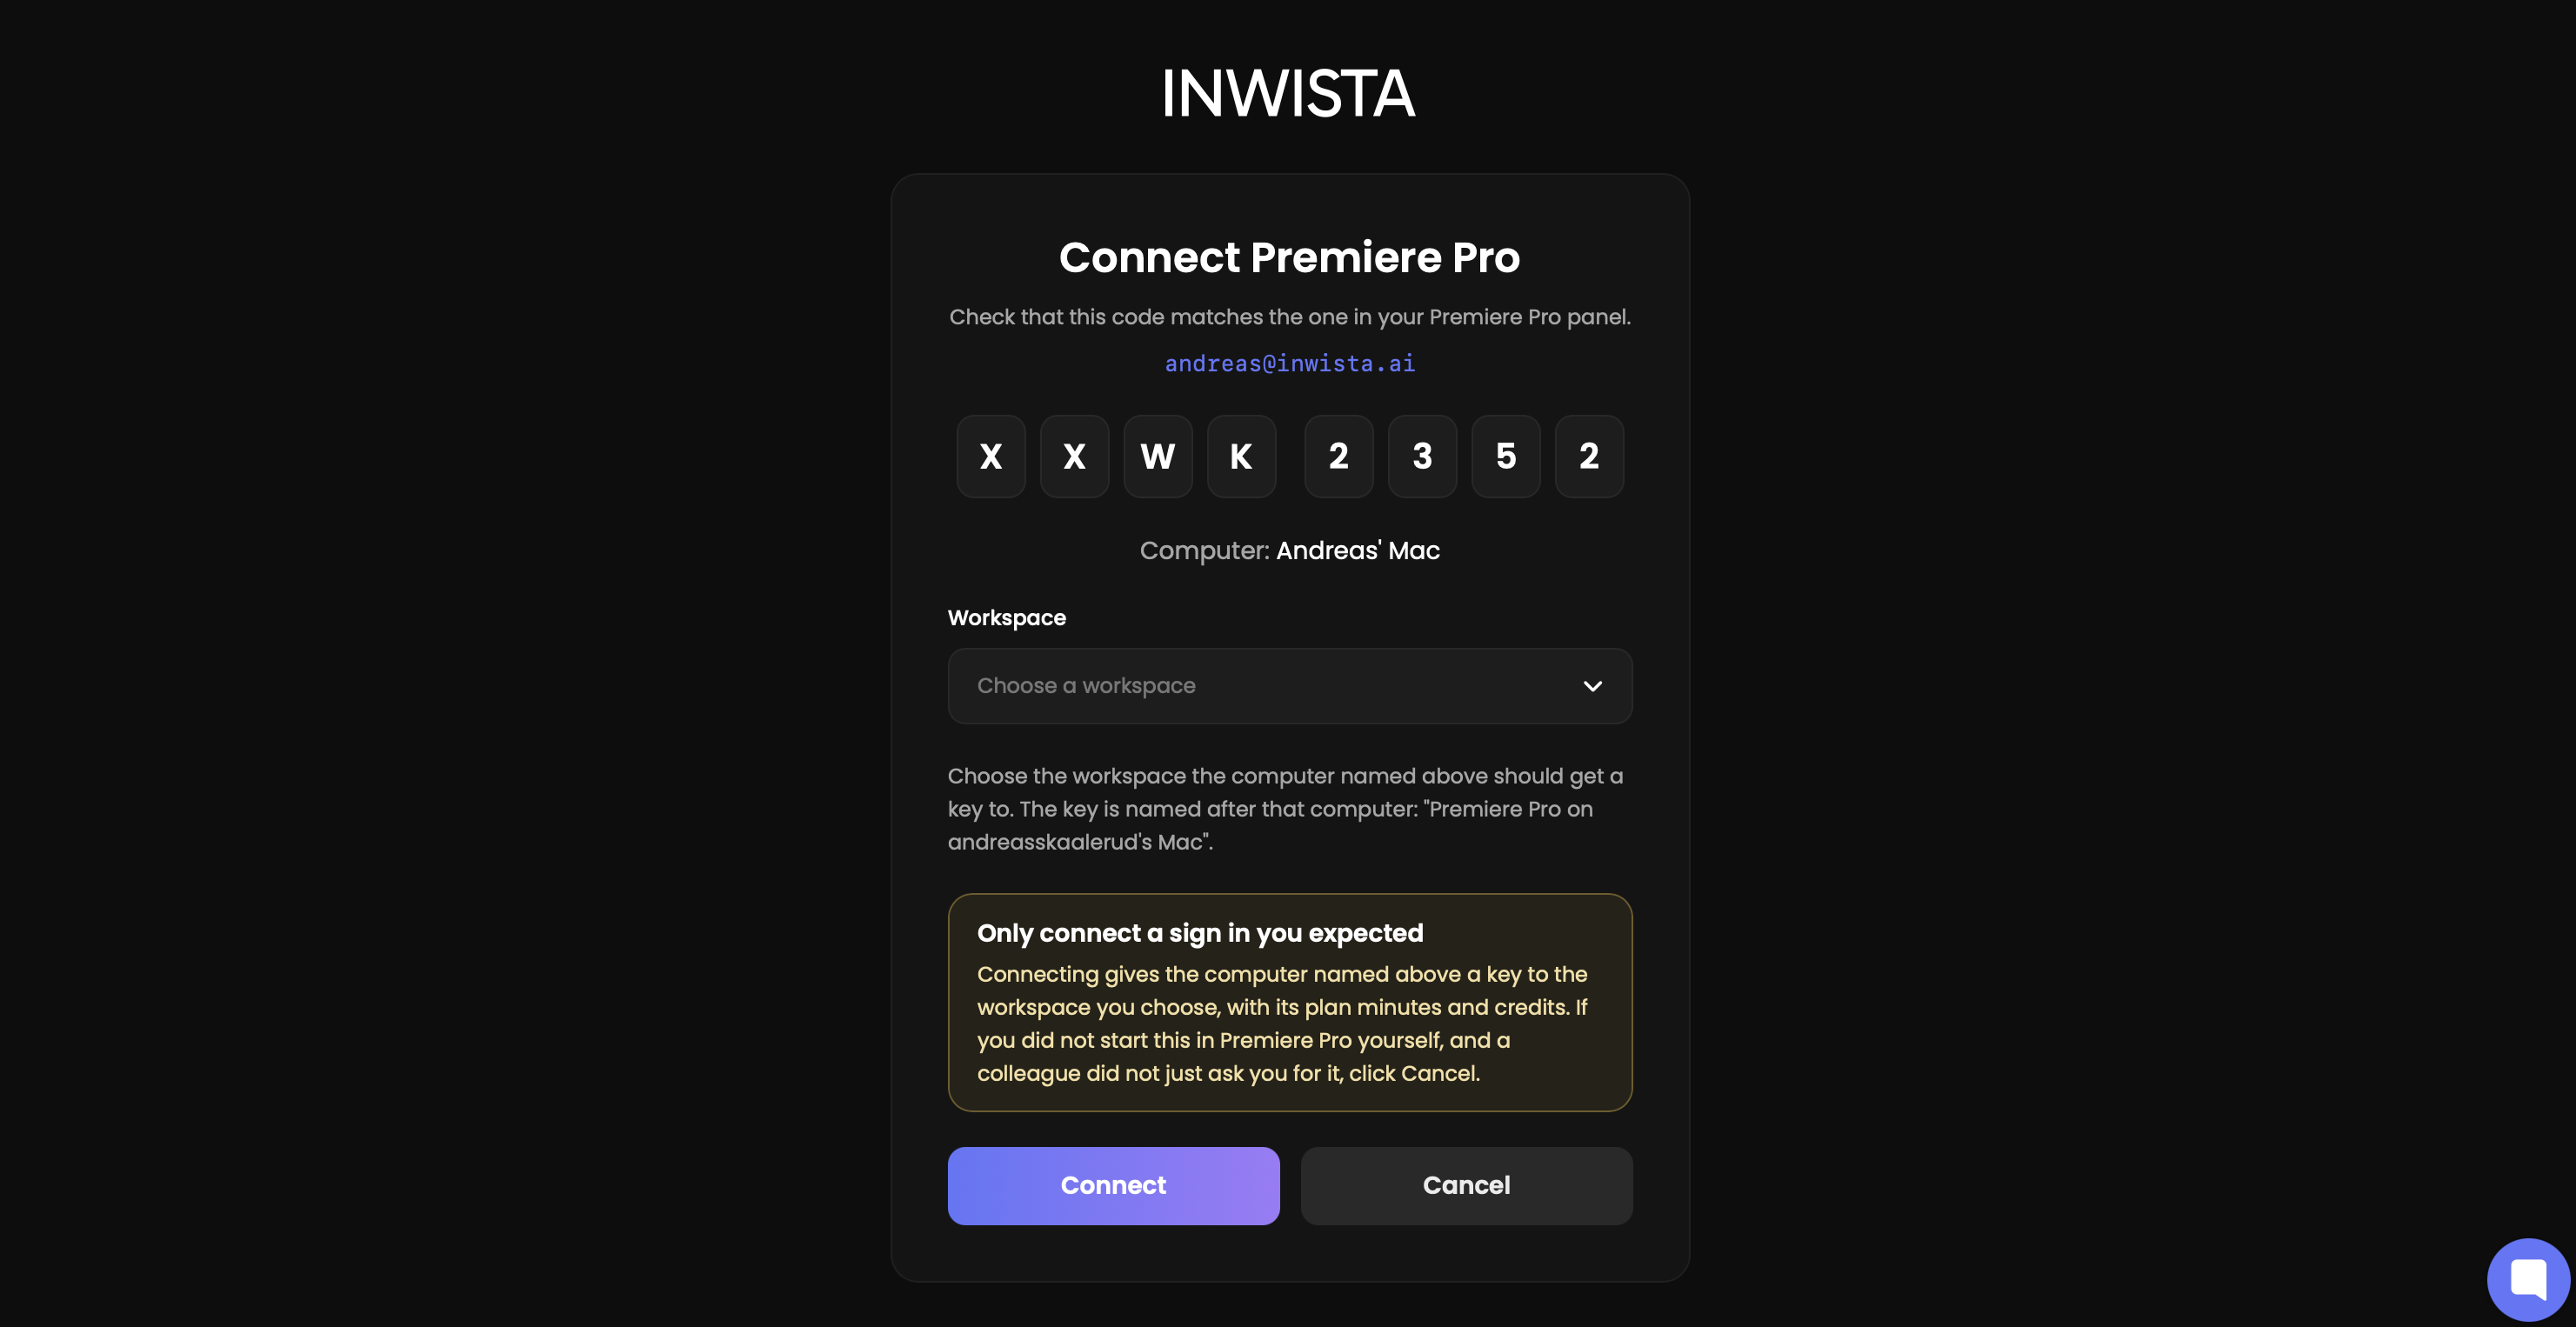
Not an administrator? The connect page will tell you. Send the code to the owner of the workspace. They can open inwista.ai/connect in any browser and enter it while the code is still valid. The panel counts down how long that is.
Approving creates a key for this computer, named after it, for example Premiere Pro on Anna's Mac. You will find it under API Keys on your workspace page, where you can remove it at any time.
Step 4. Check your workspace
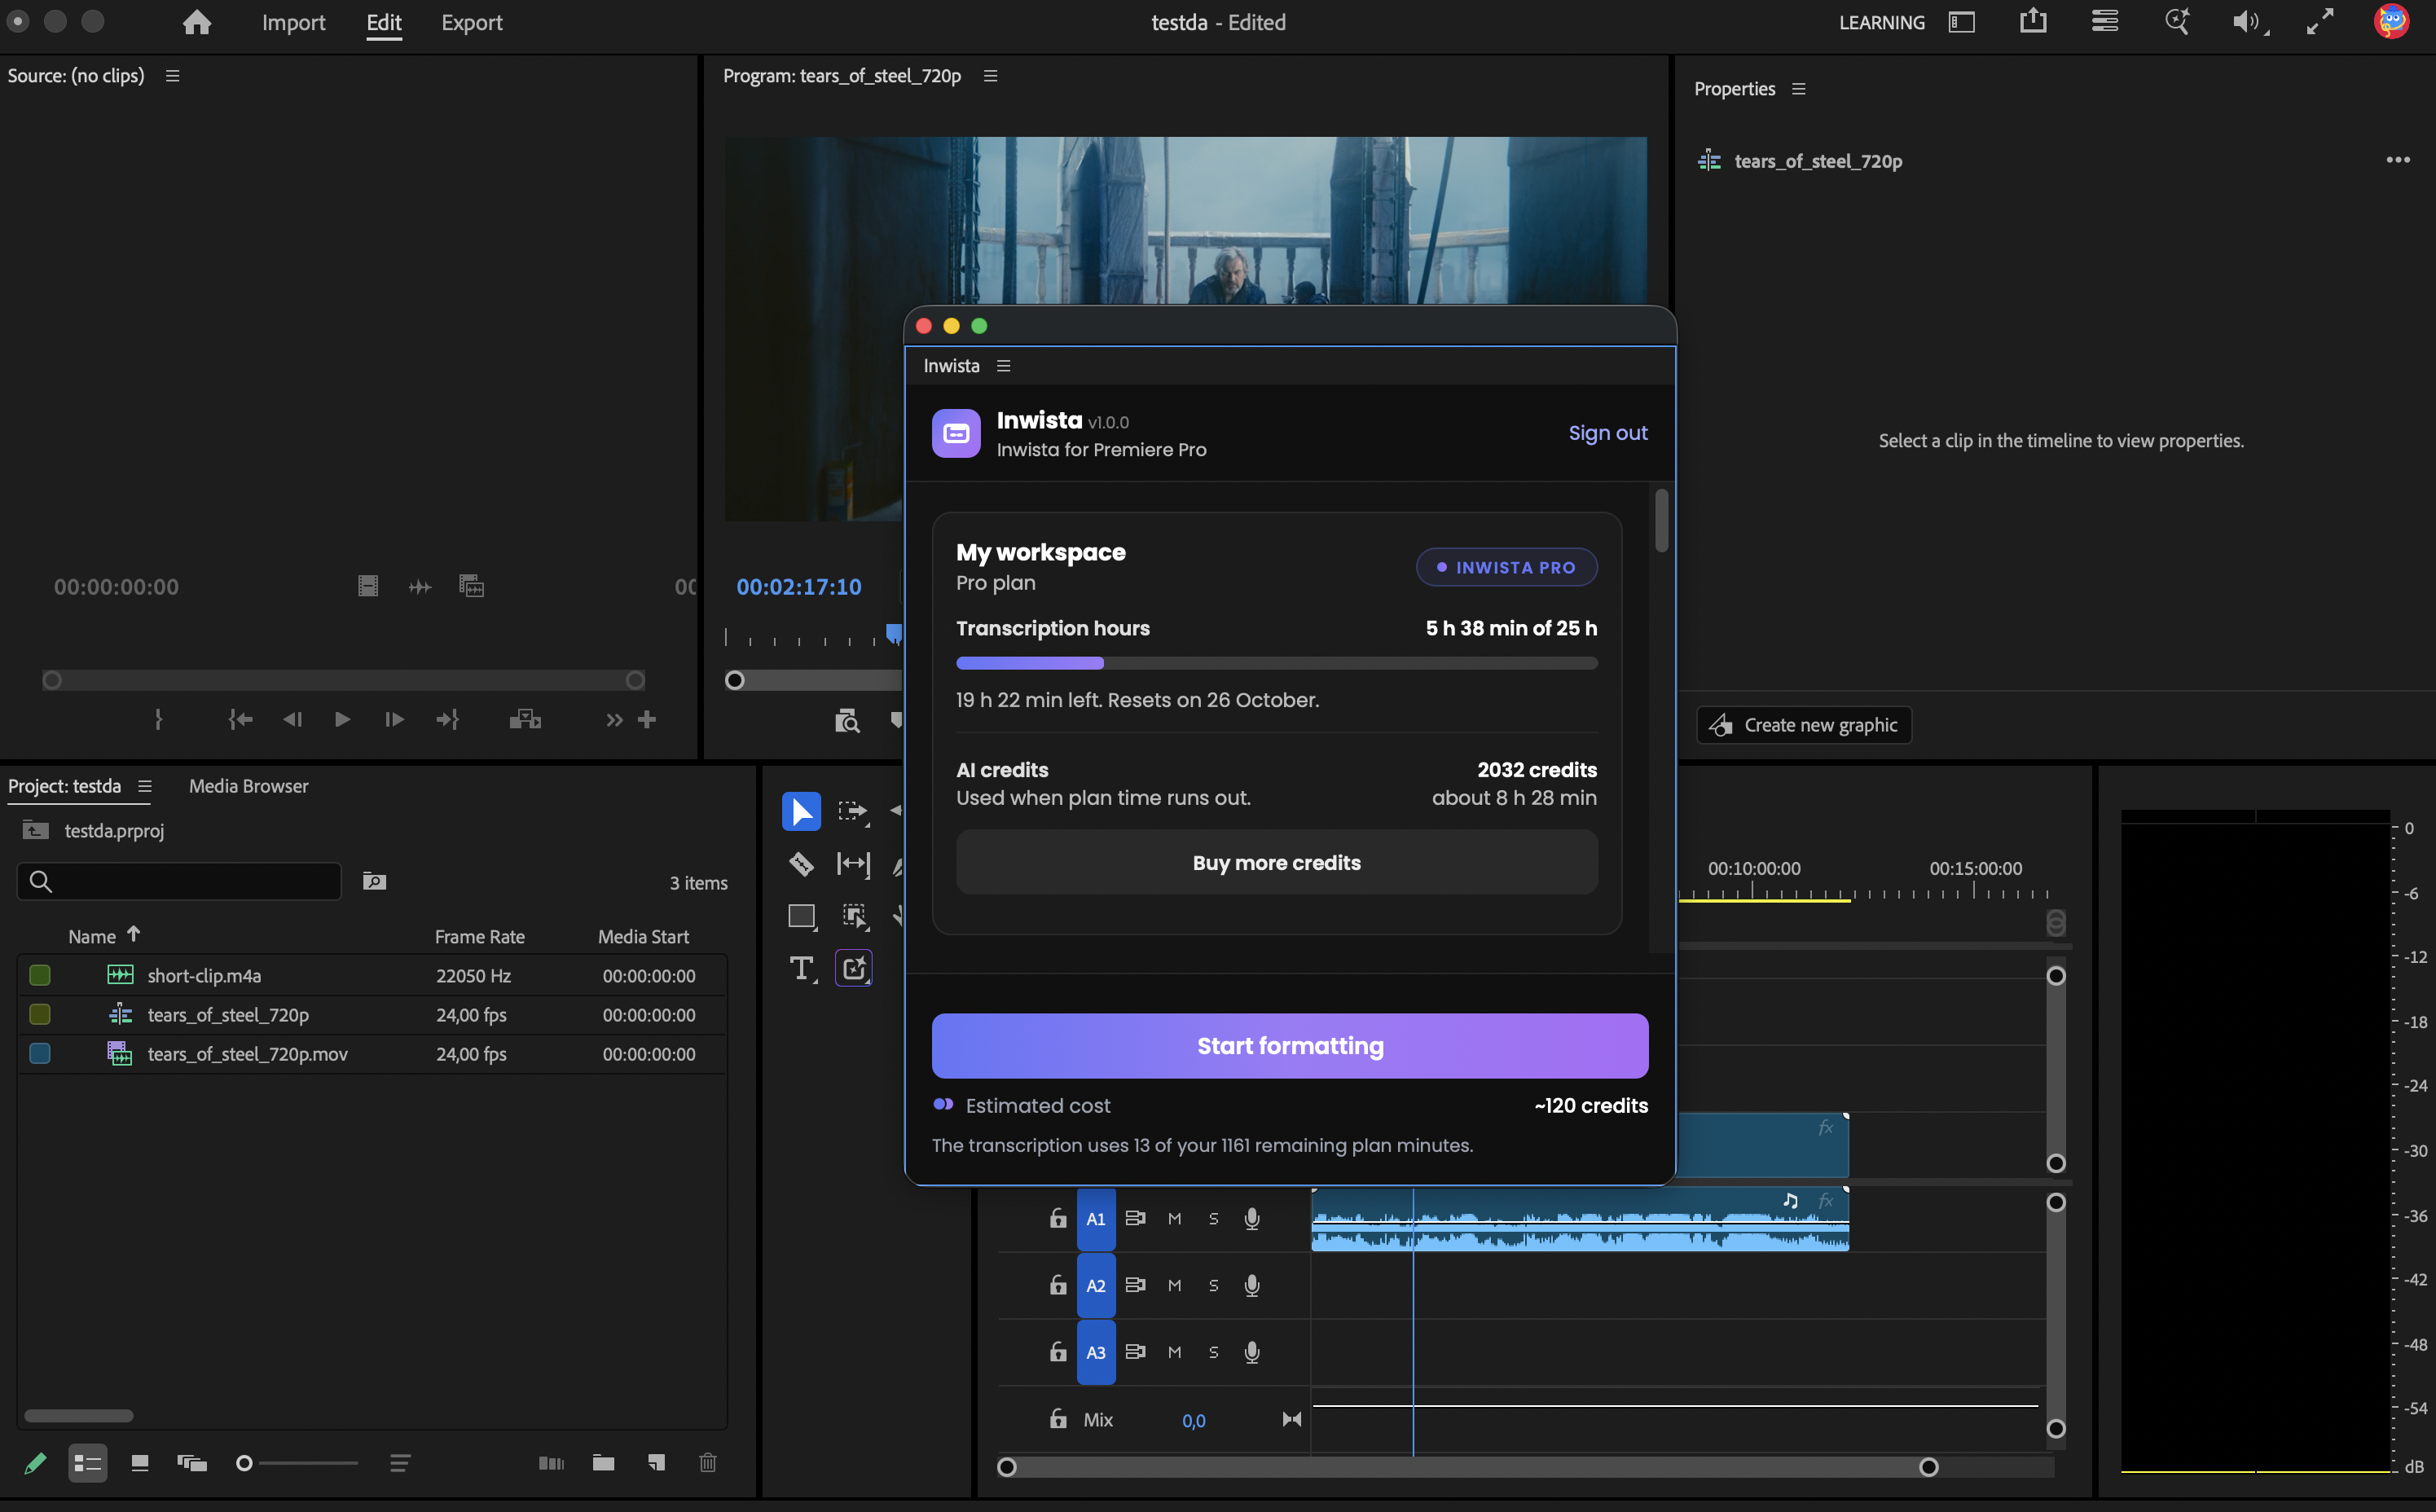
The card at the top of the panel shows which workspace you are connected to, its plan and how much transcription time you have used this month. On the Free plan this is a bar out of 45 minutes, with the date it resets.
Step 5. Choose the sequence and its audio
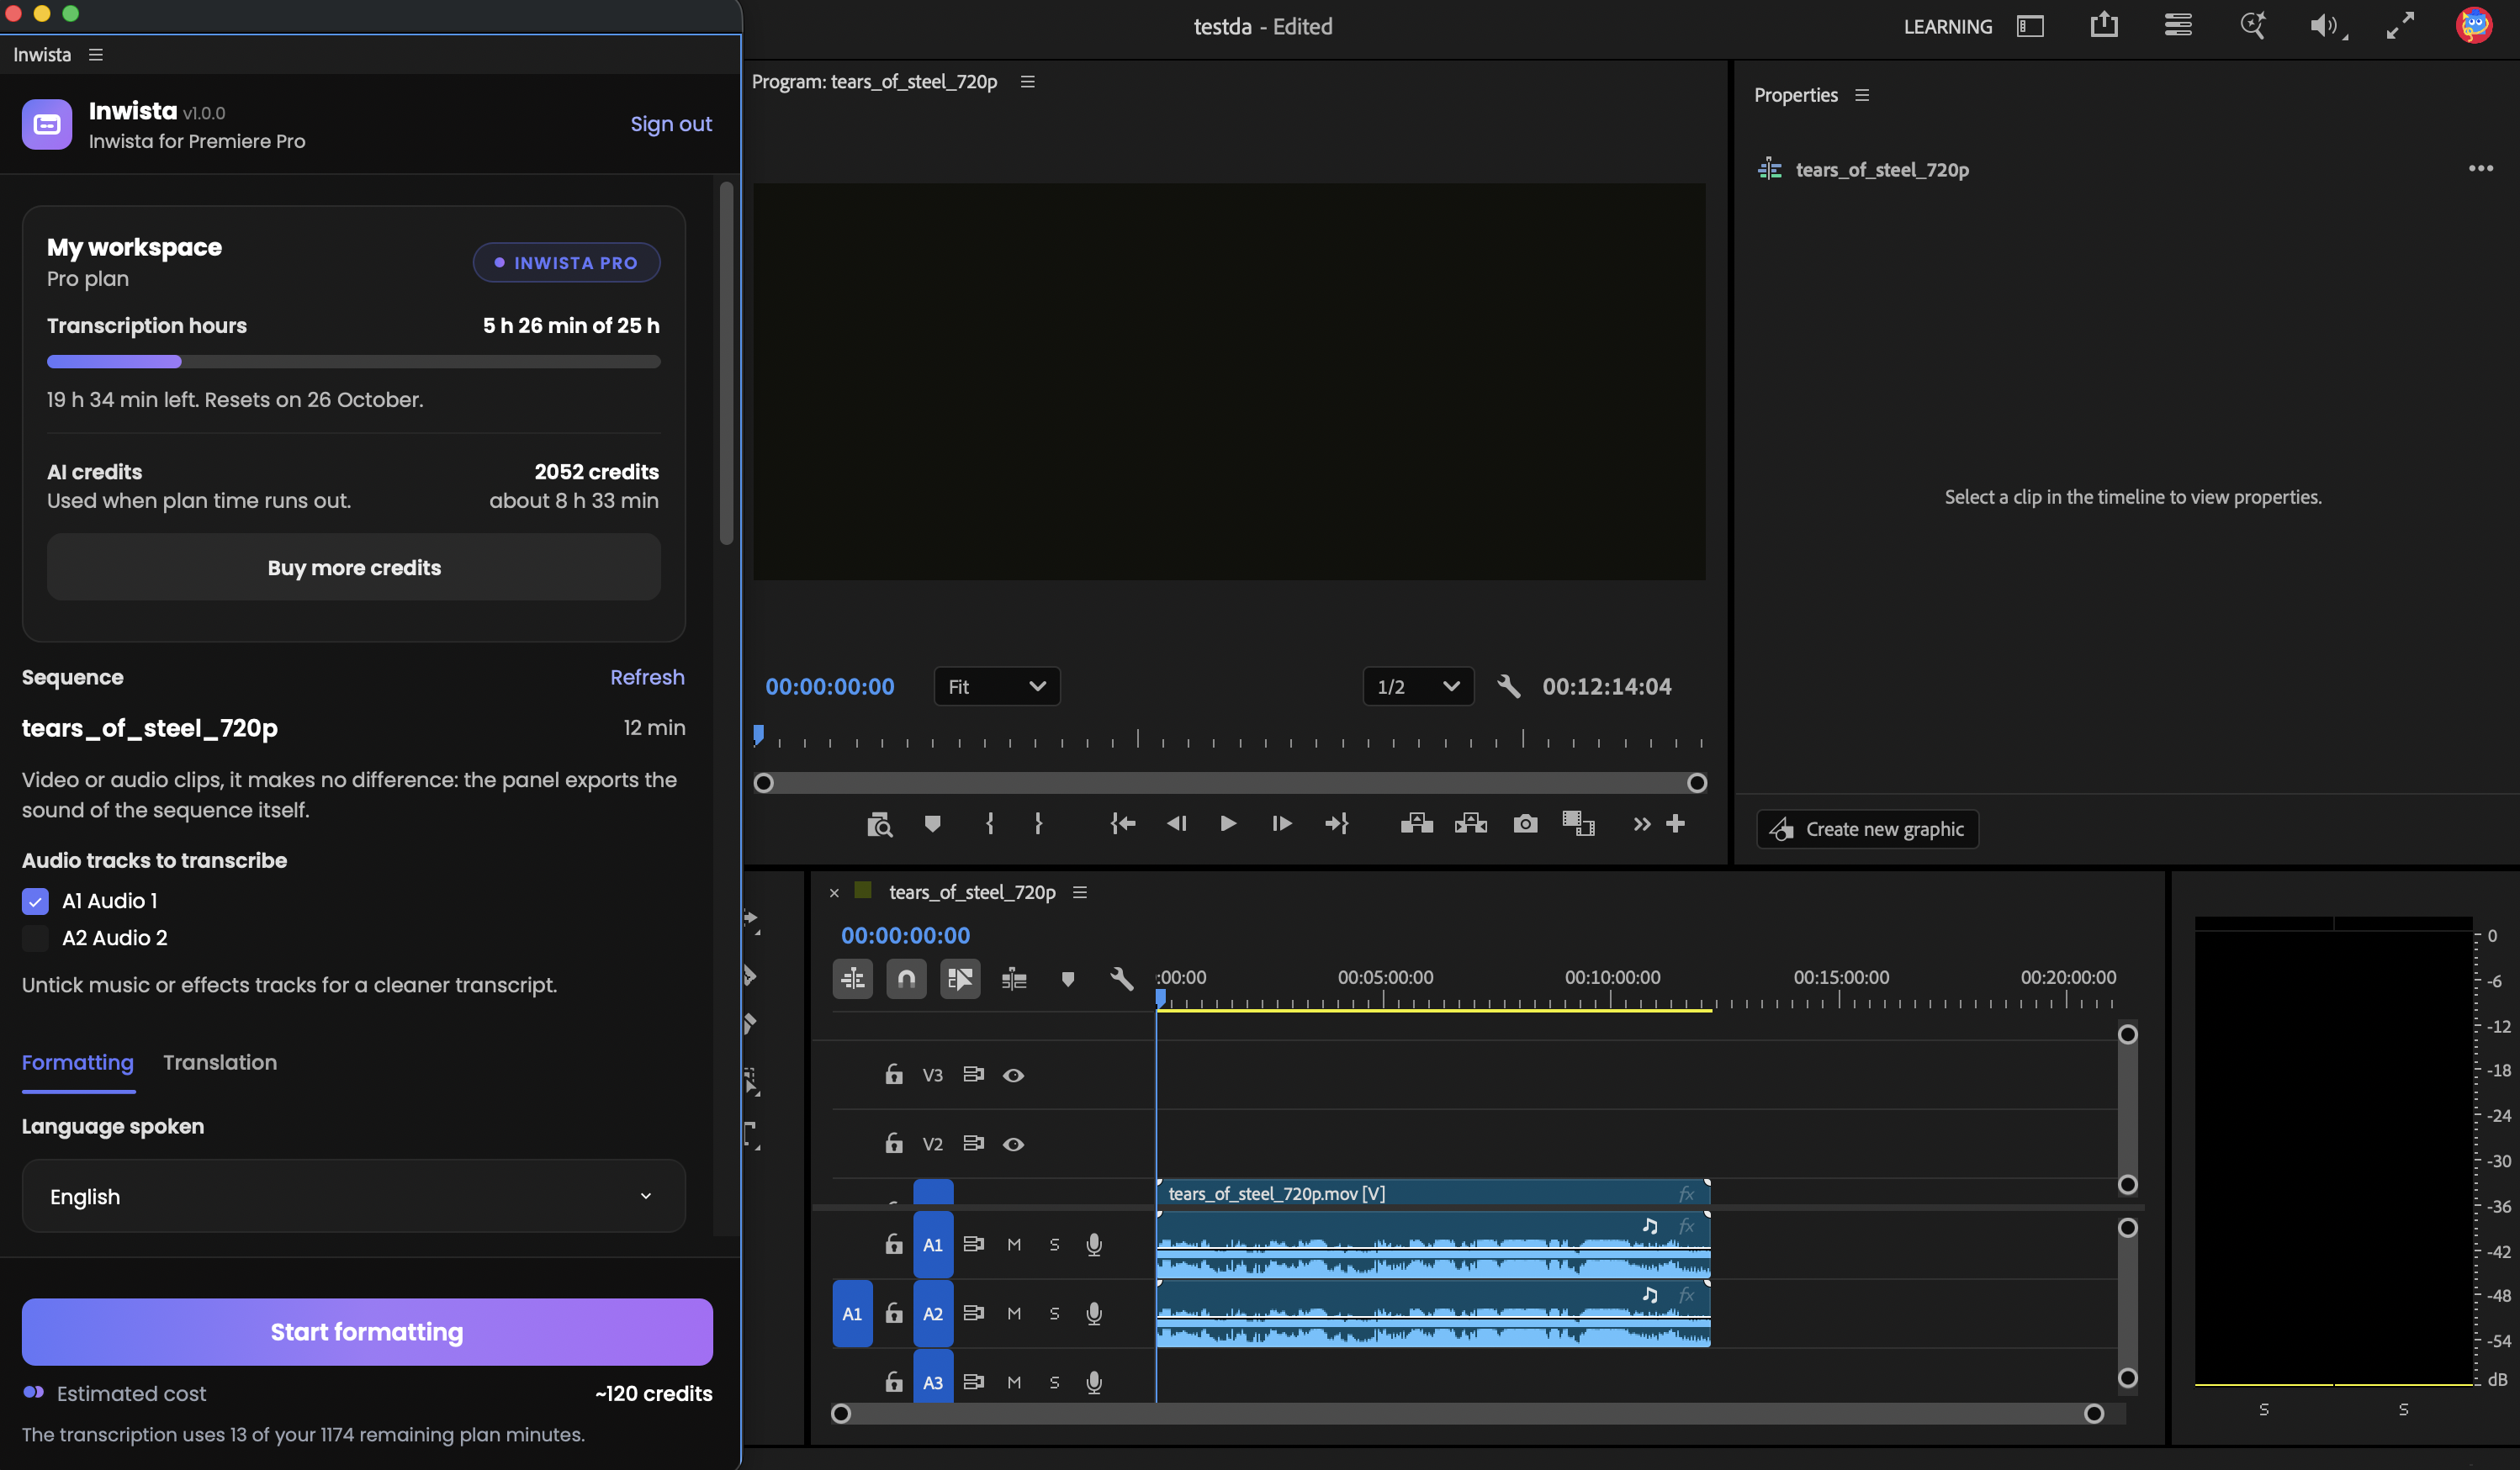
The panel works on the sequence that is active in Premiere Pro and shows its name and length. If it says No sequence open, click into the timeline you want and press Refresh.
If the sequence has several audio tracks, each one gets a tick box under Audio tracks to transcribe. Untick music and effects for a cleaner transcript. The panel only mutes them while it exports the audio and puts your settings back afterwards.
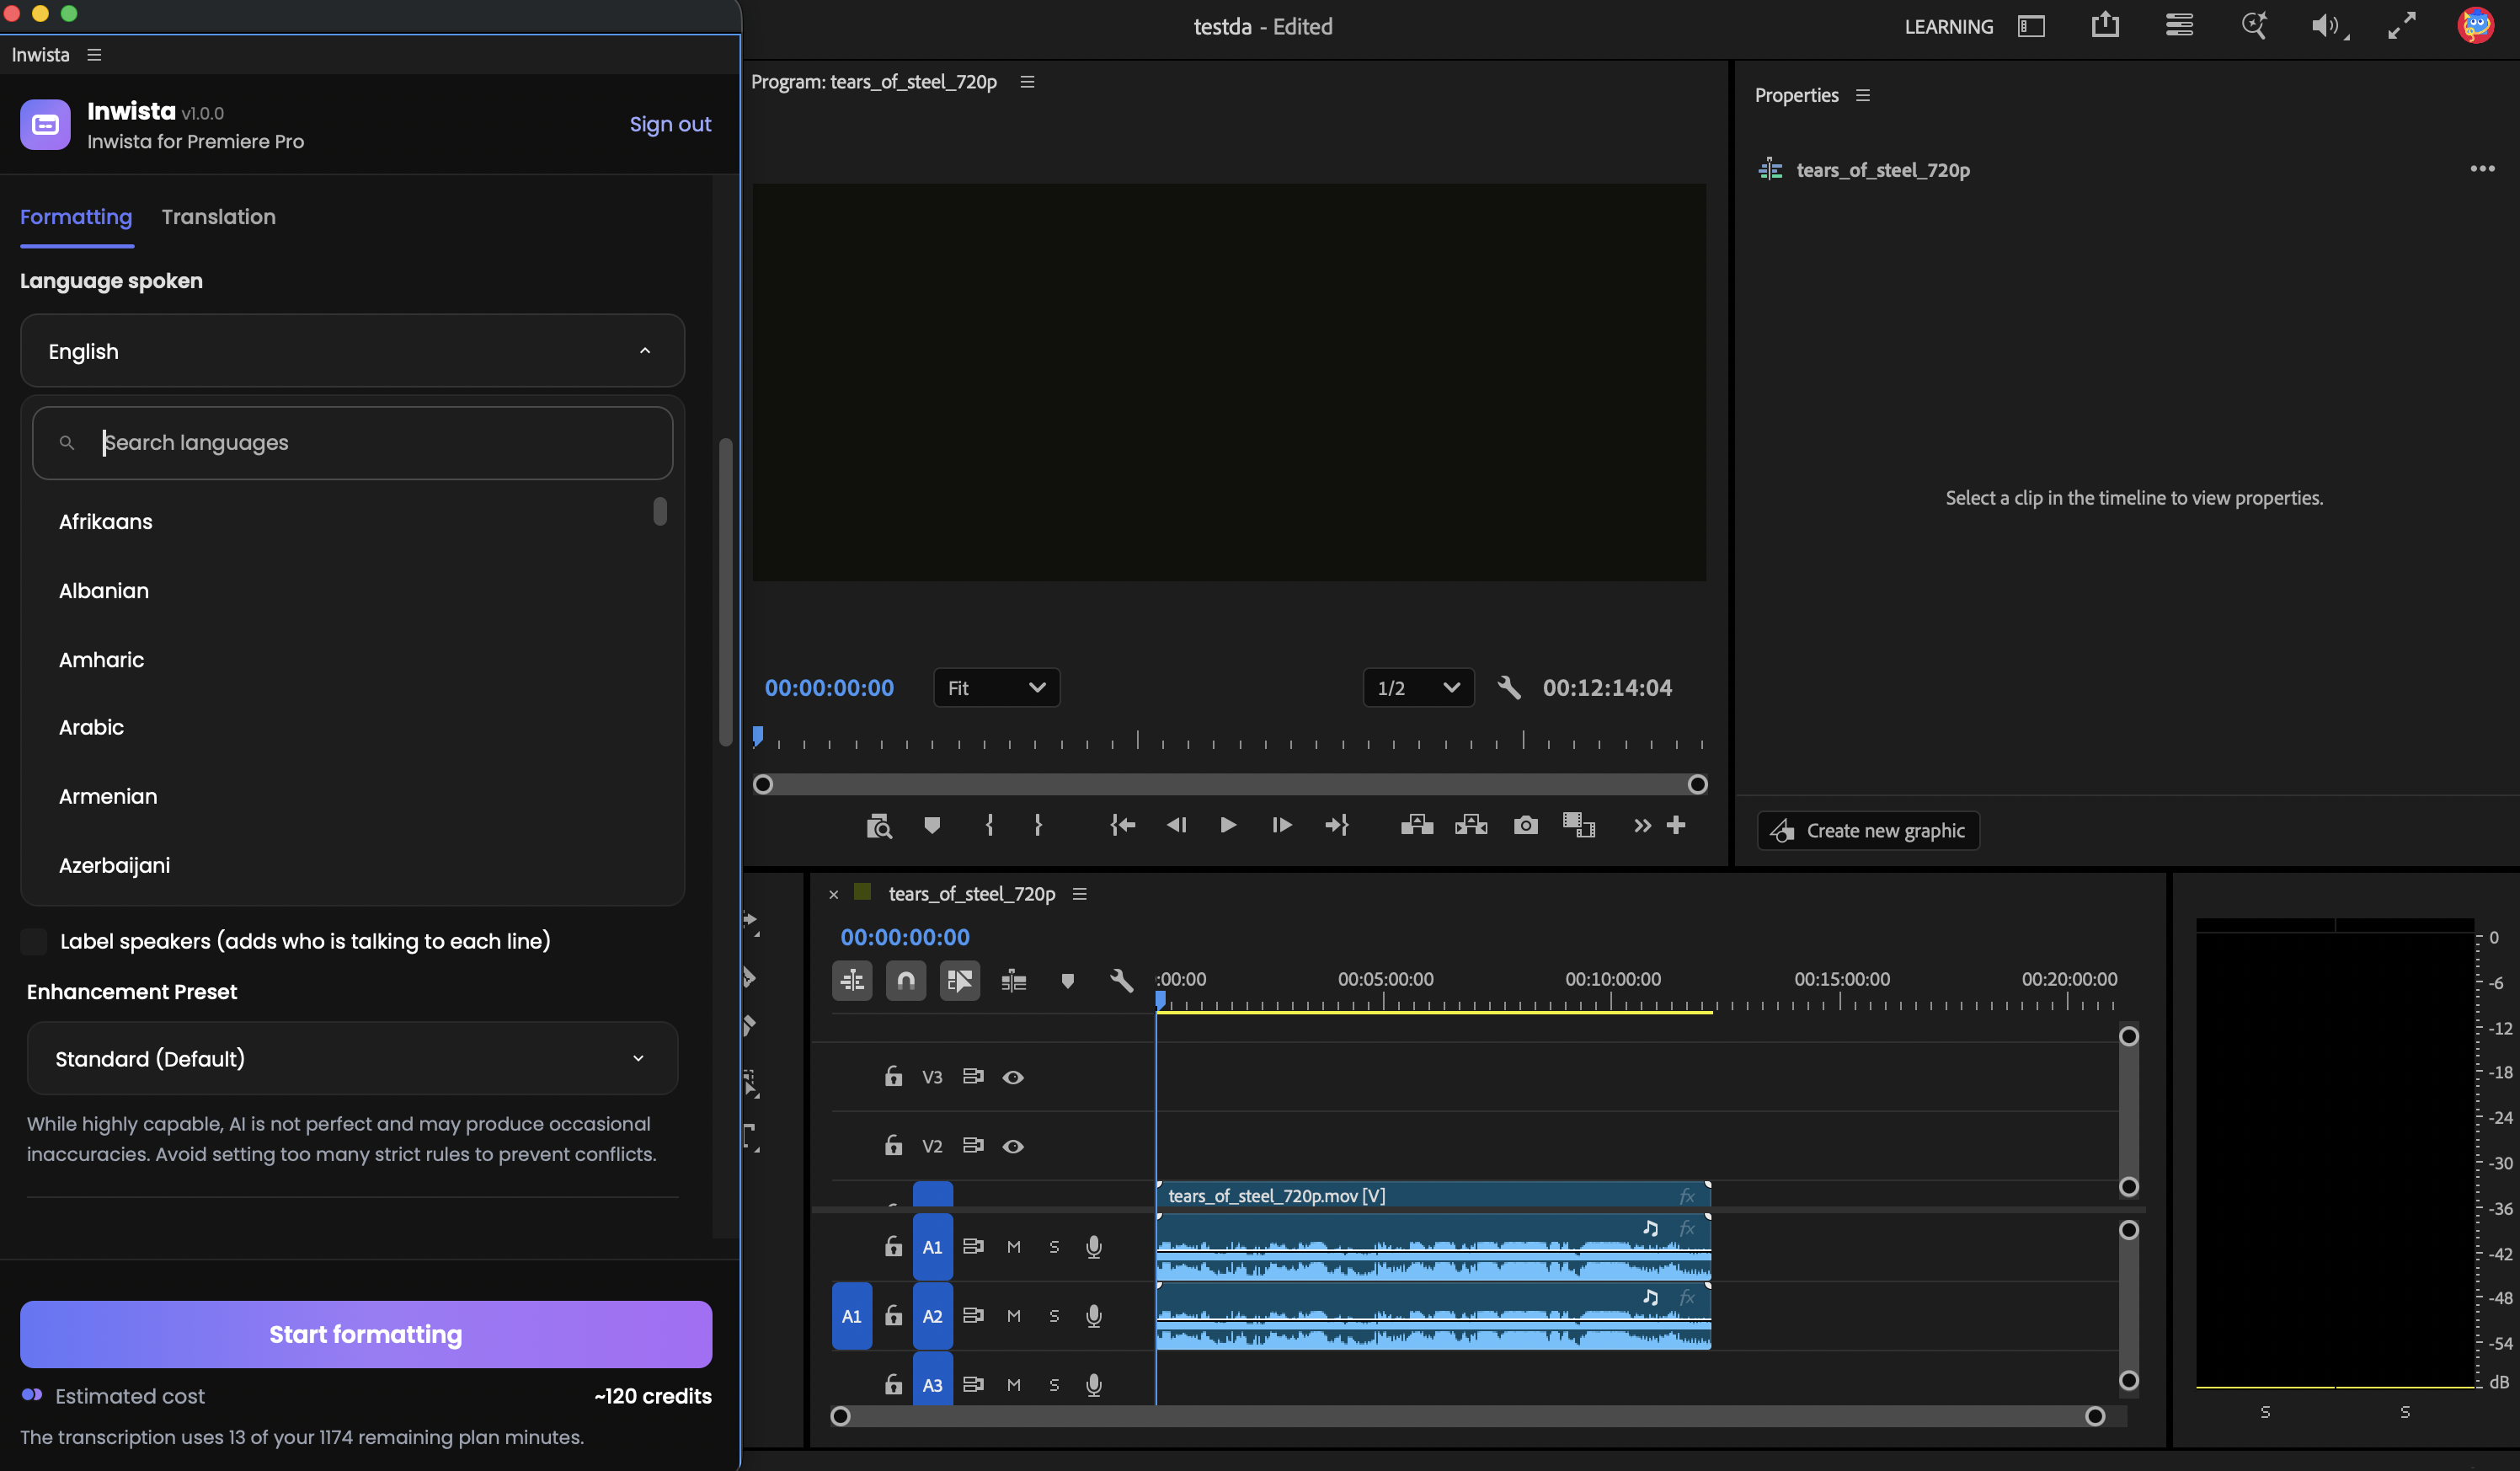
Step 6. Pick the language spoken
Language spoken is a searchable list of 70+ languages, including Norwegian Bokmål and Nynorsk, Swedish, Danish, Finnish and Icelandic. Type a few letters and press Enter.
For interviews and conversations, tick Label speakers. If you know how many people speak, set it under Advanced settings to help the labels land on the right voices.
Formatting your subtitles
Step 7. Choose a preset on the Formatting tab
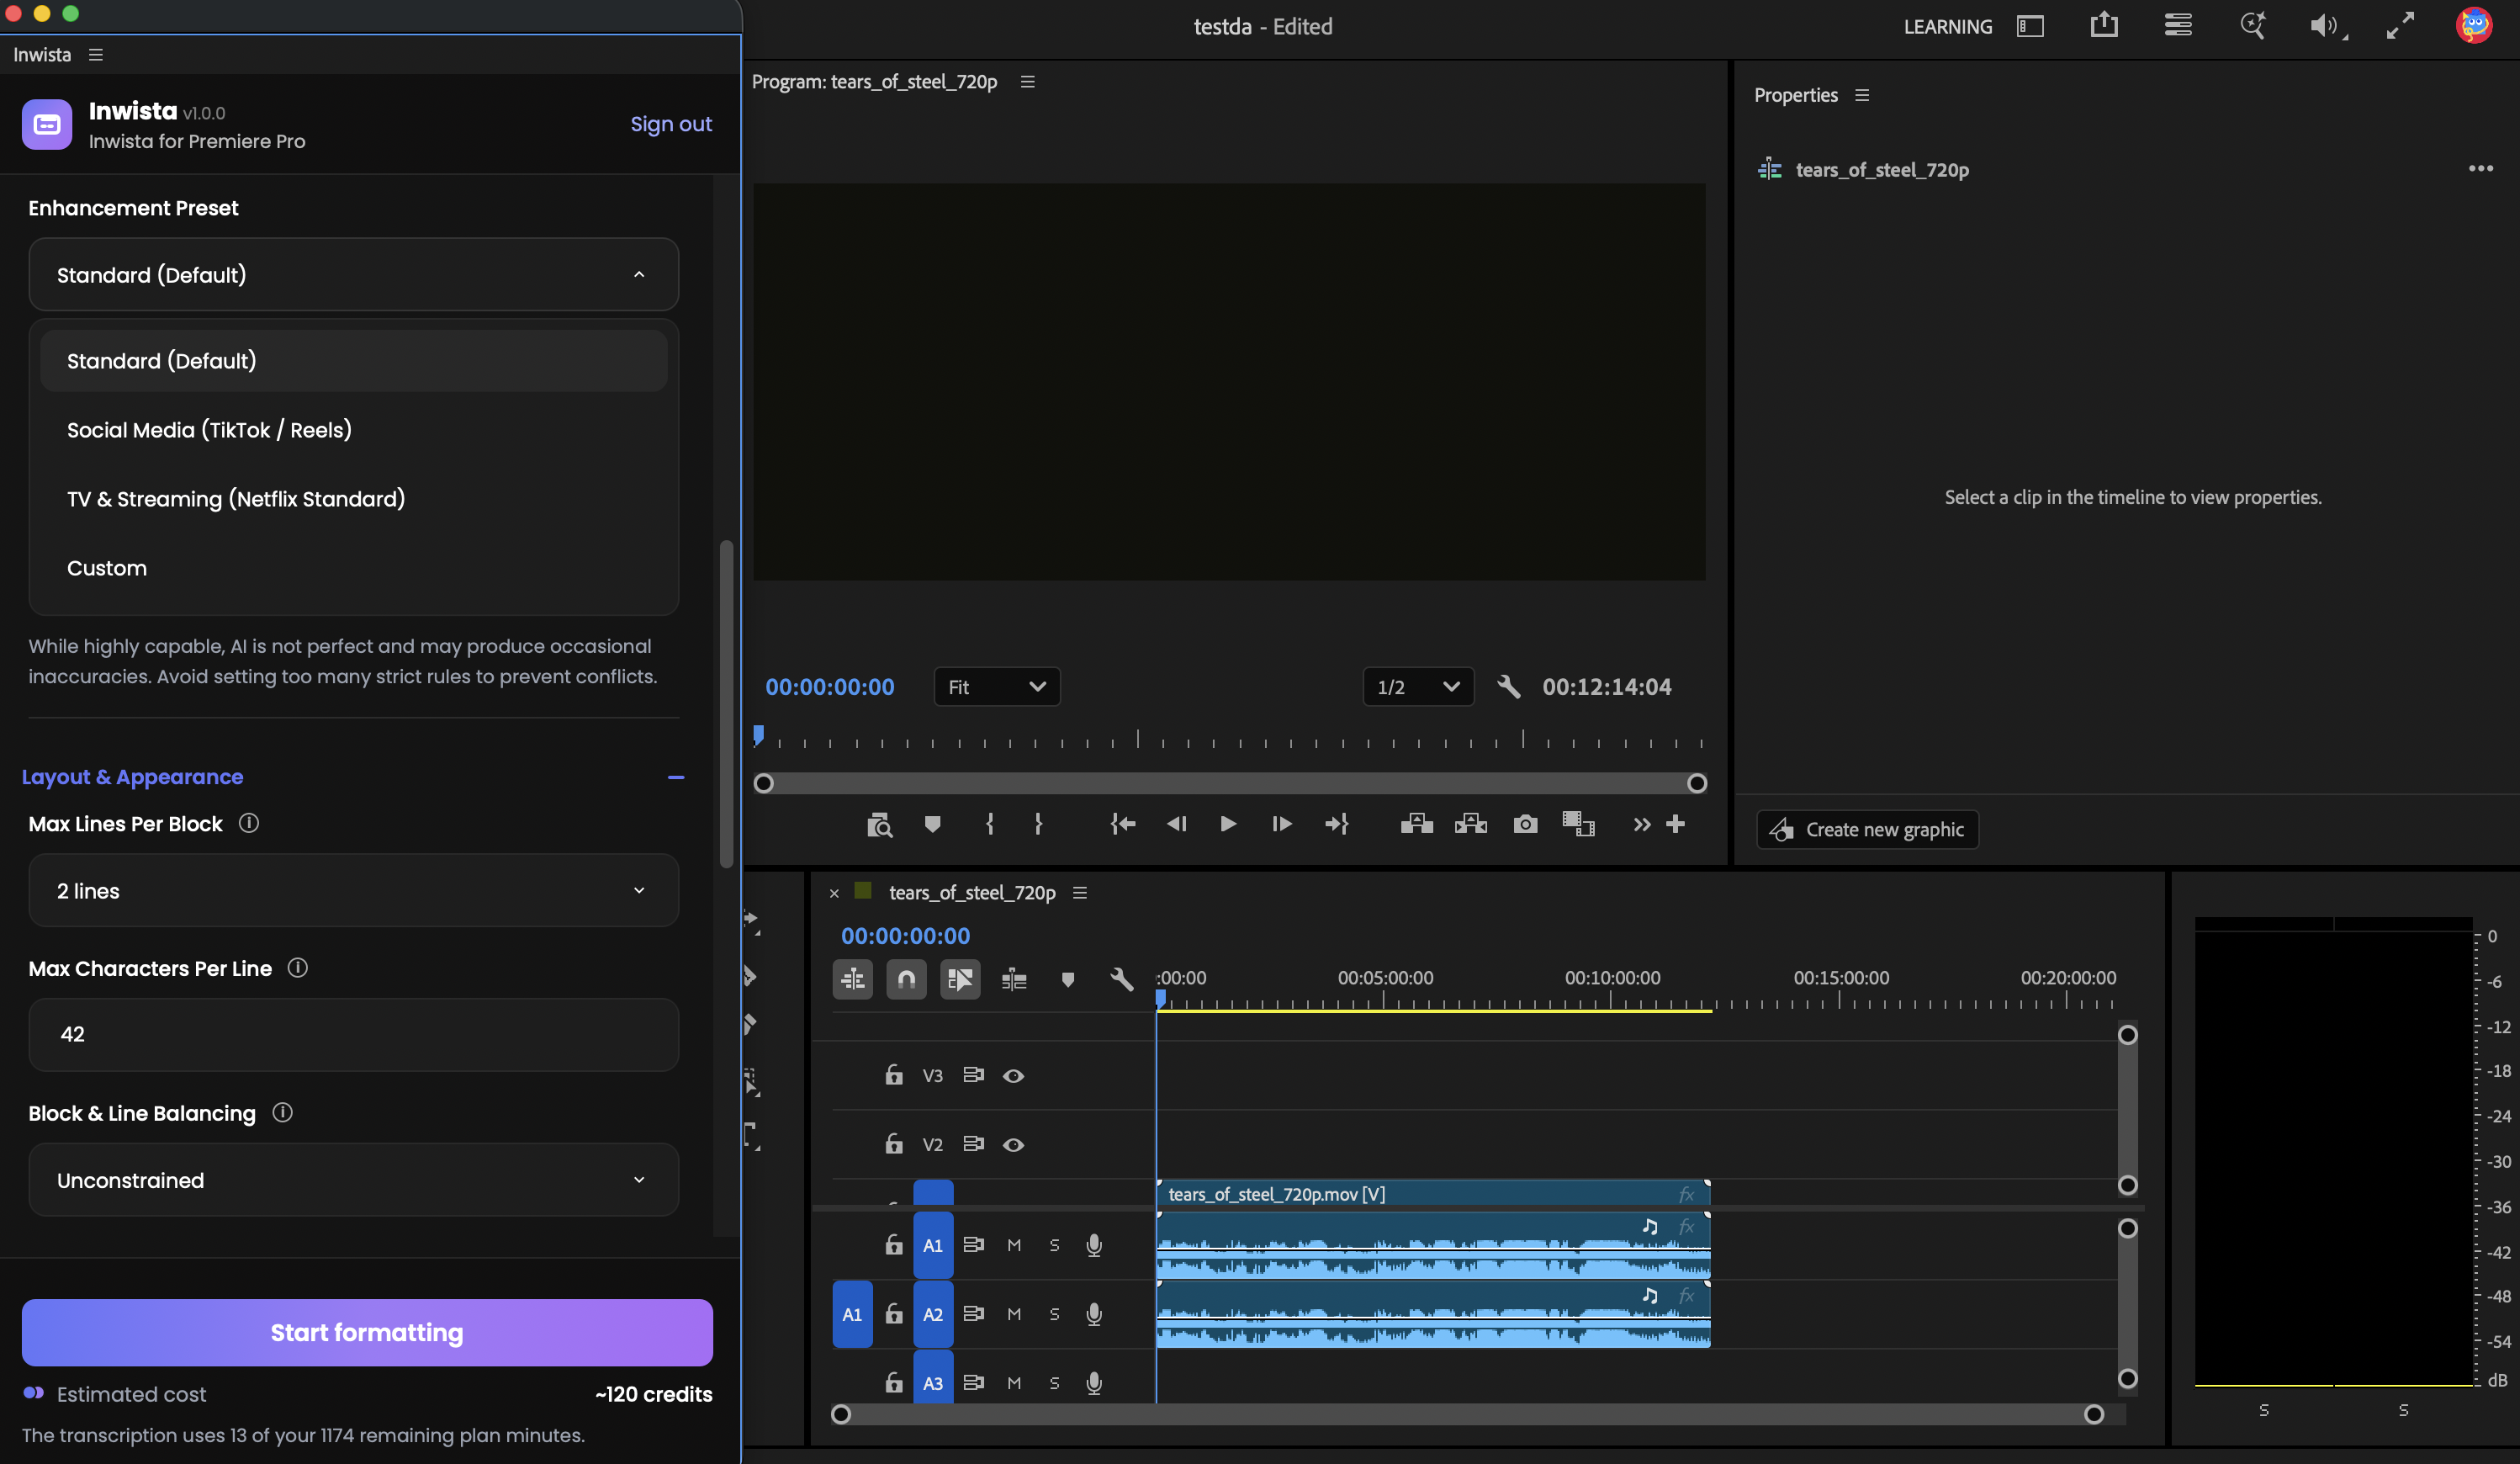
The Formatting tab turns the raw transcript into subtitles that are comfortable to read. Start with a preset:
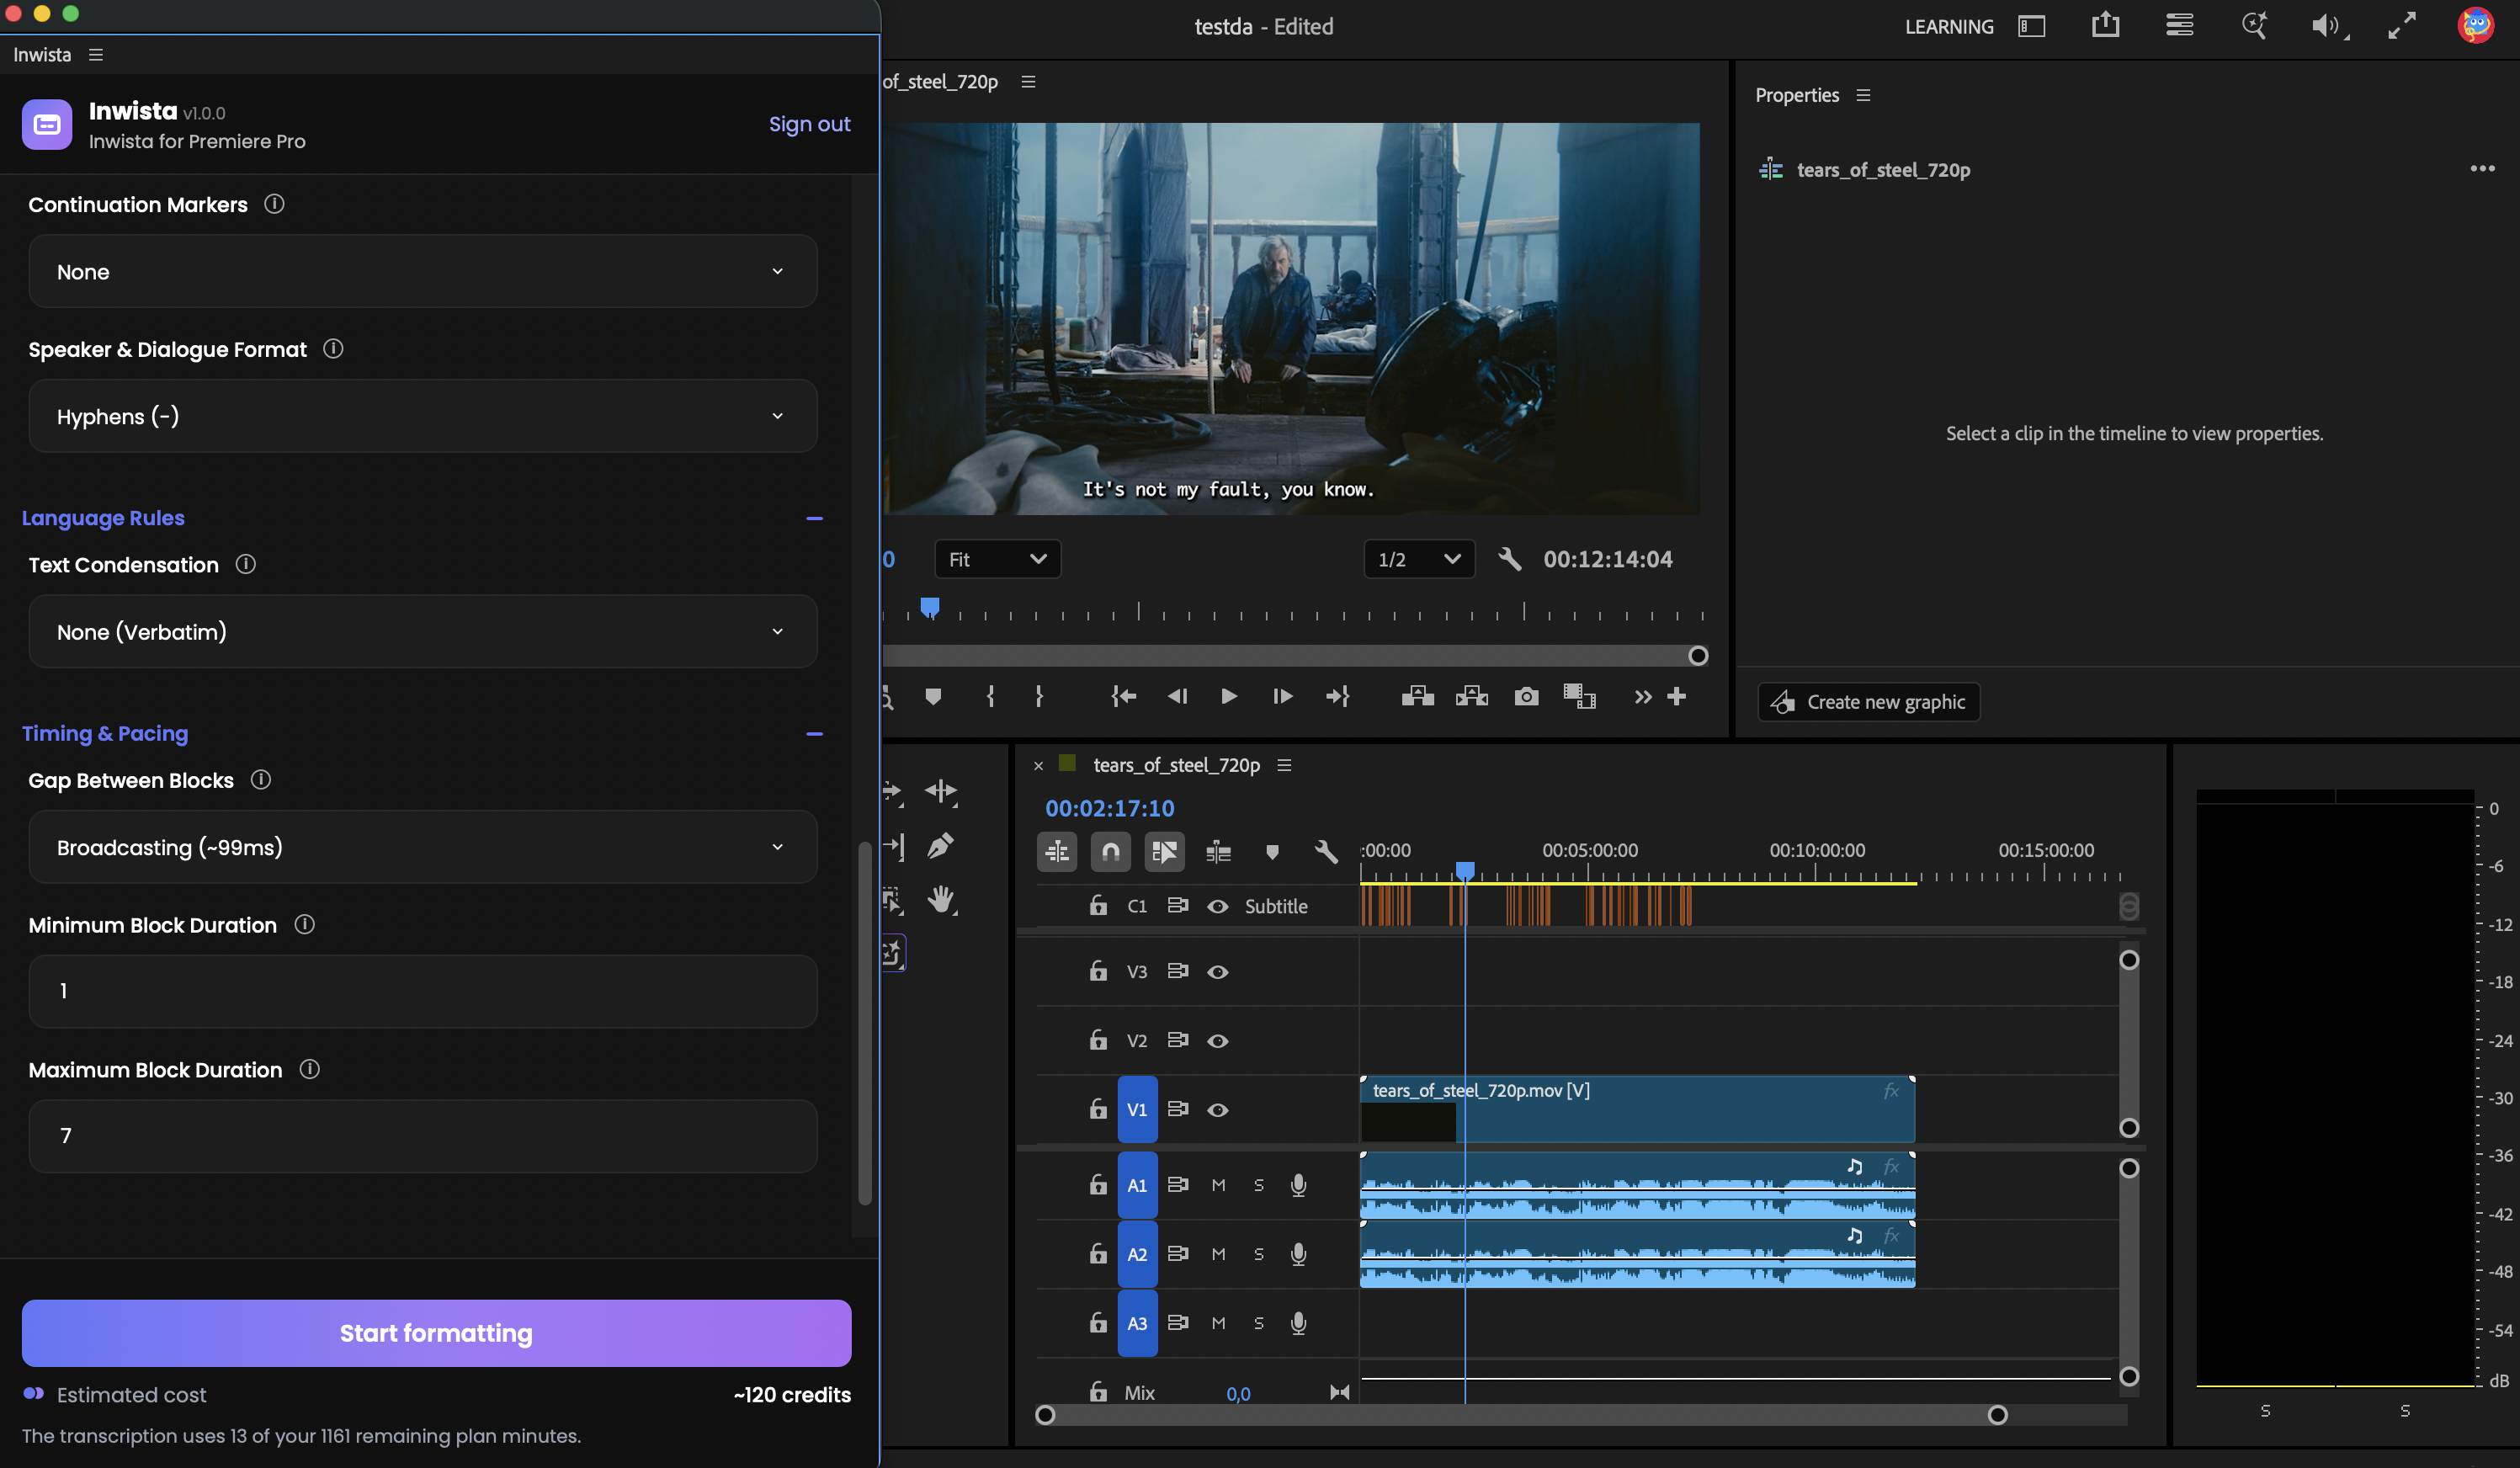
- Standard (Default). Two lines of up to 42 characters, a short gap between subtitles and between 1 and 7 seconds on screen. Every word is kept.
- Social Media (TikTok / Reels). One line of up to 35 characters and shorter subtitles, for vertical video.
- TV & Streaming (Netflix Standard). The Standard rules, plus a hyphen in front of each speaker when two people share a subtitle.
Want to adjust something? Open Layout & Appearance, Language Rules or Timing & Pacing below the preset. Change any value and the preset switches to Custom on its own. Hover over the small i next to a setting to see what it does. If you are unsure which rules fit your project, this article on reading speed and line breaks explains the reasoning behind them.
Step 8. Start, and keep editing
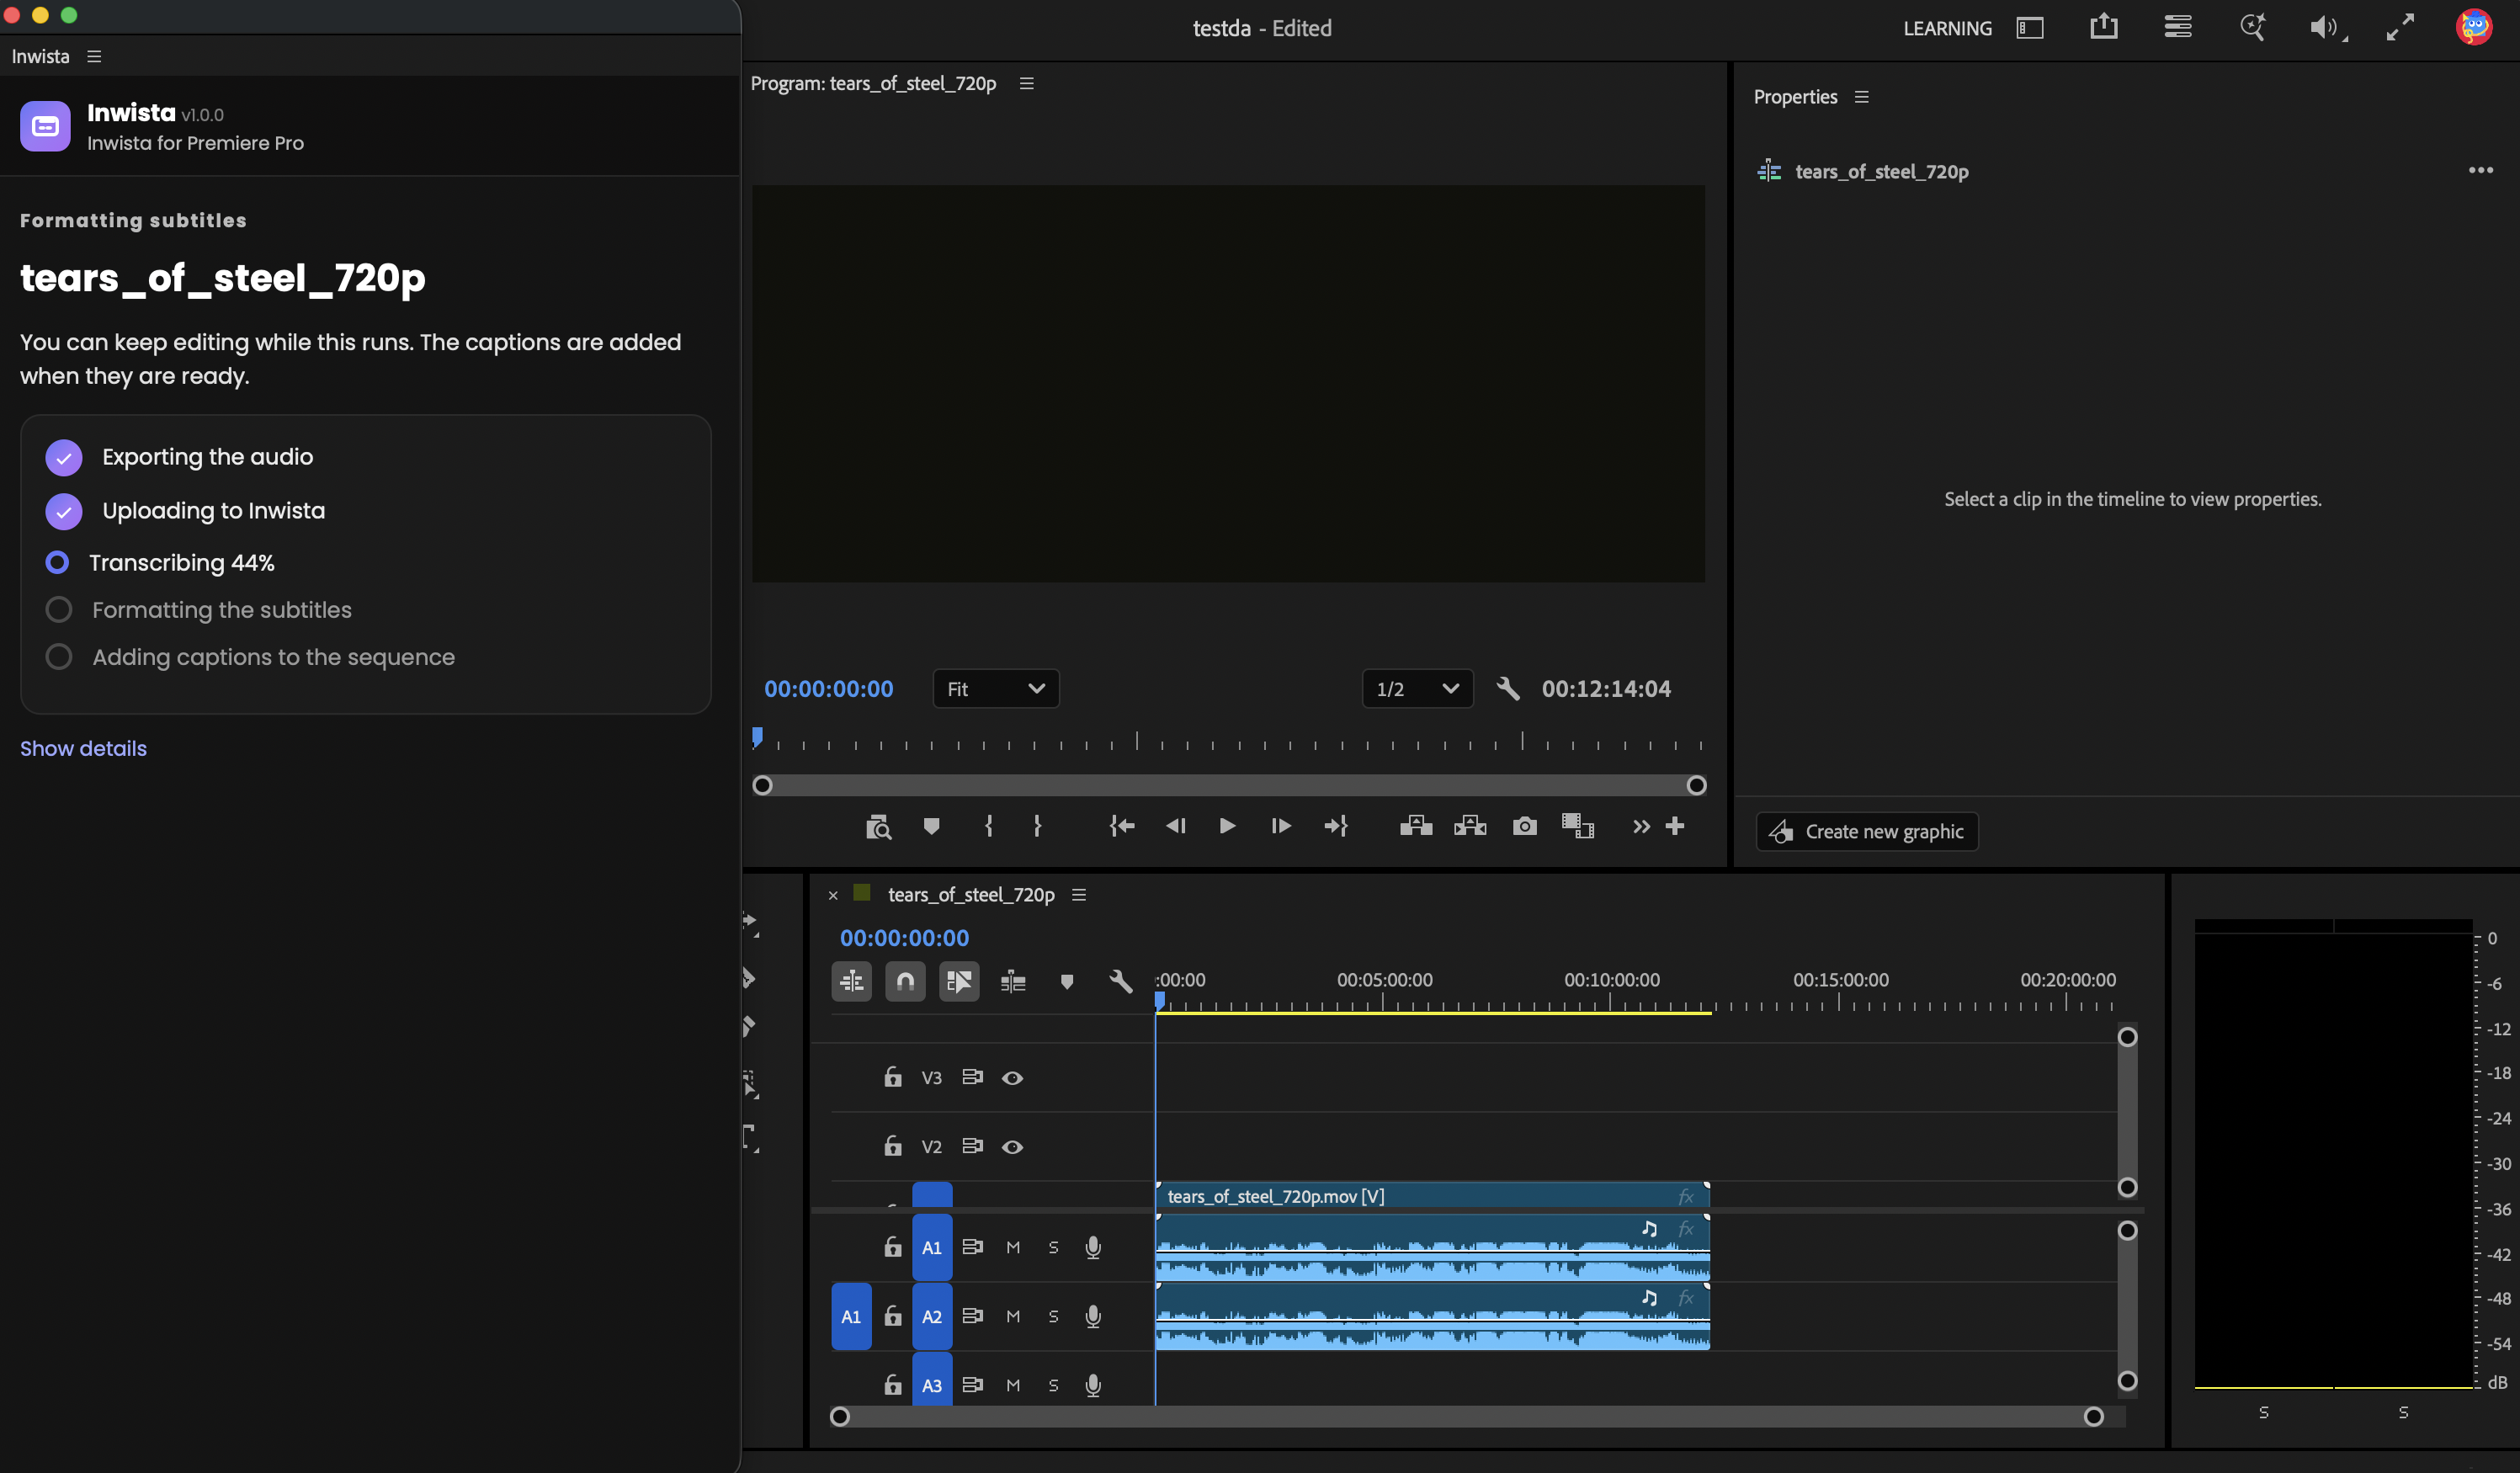
Below the button you will see an Estimated cost for the run. Click Start formatting. The panel exports the audio, uploads it, transcribes it and formats the subtitles, and it shows each step as it goes. You can keep working in Premiere Pro in the meantime.
Step 9. Find your captions
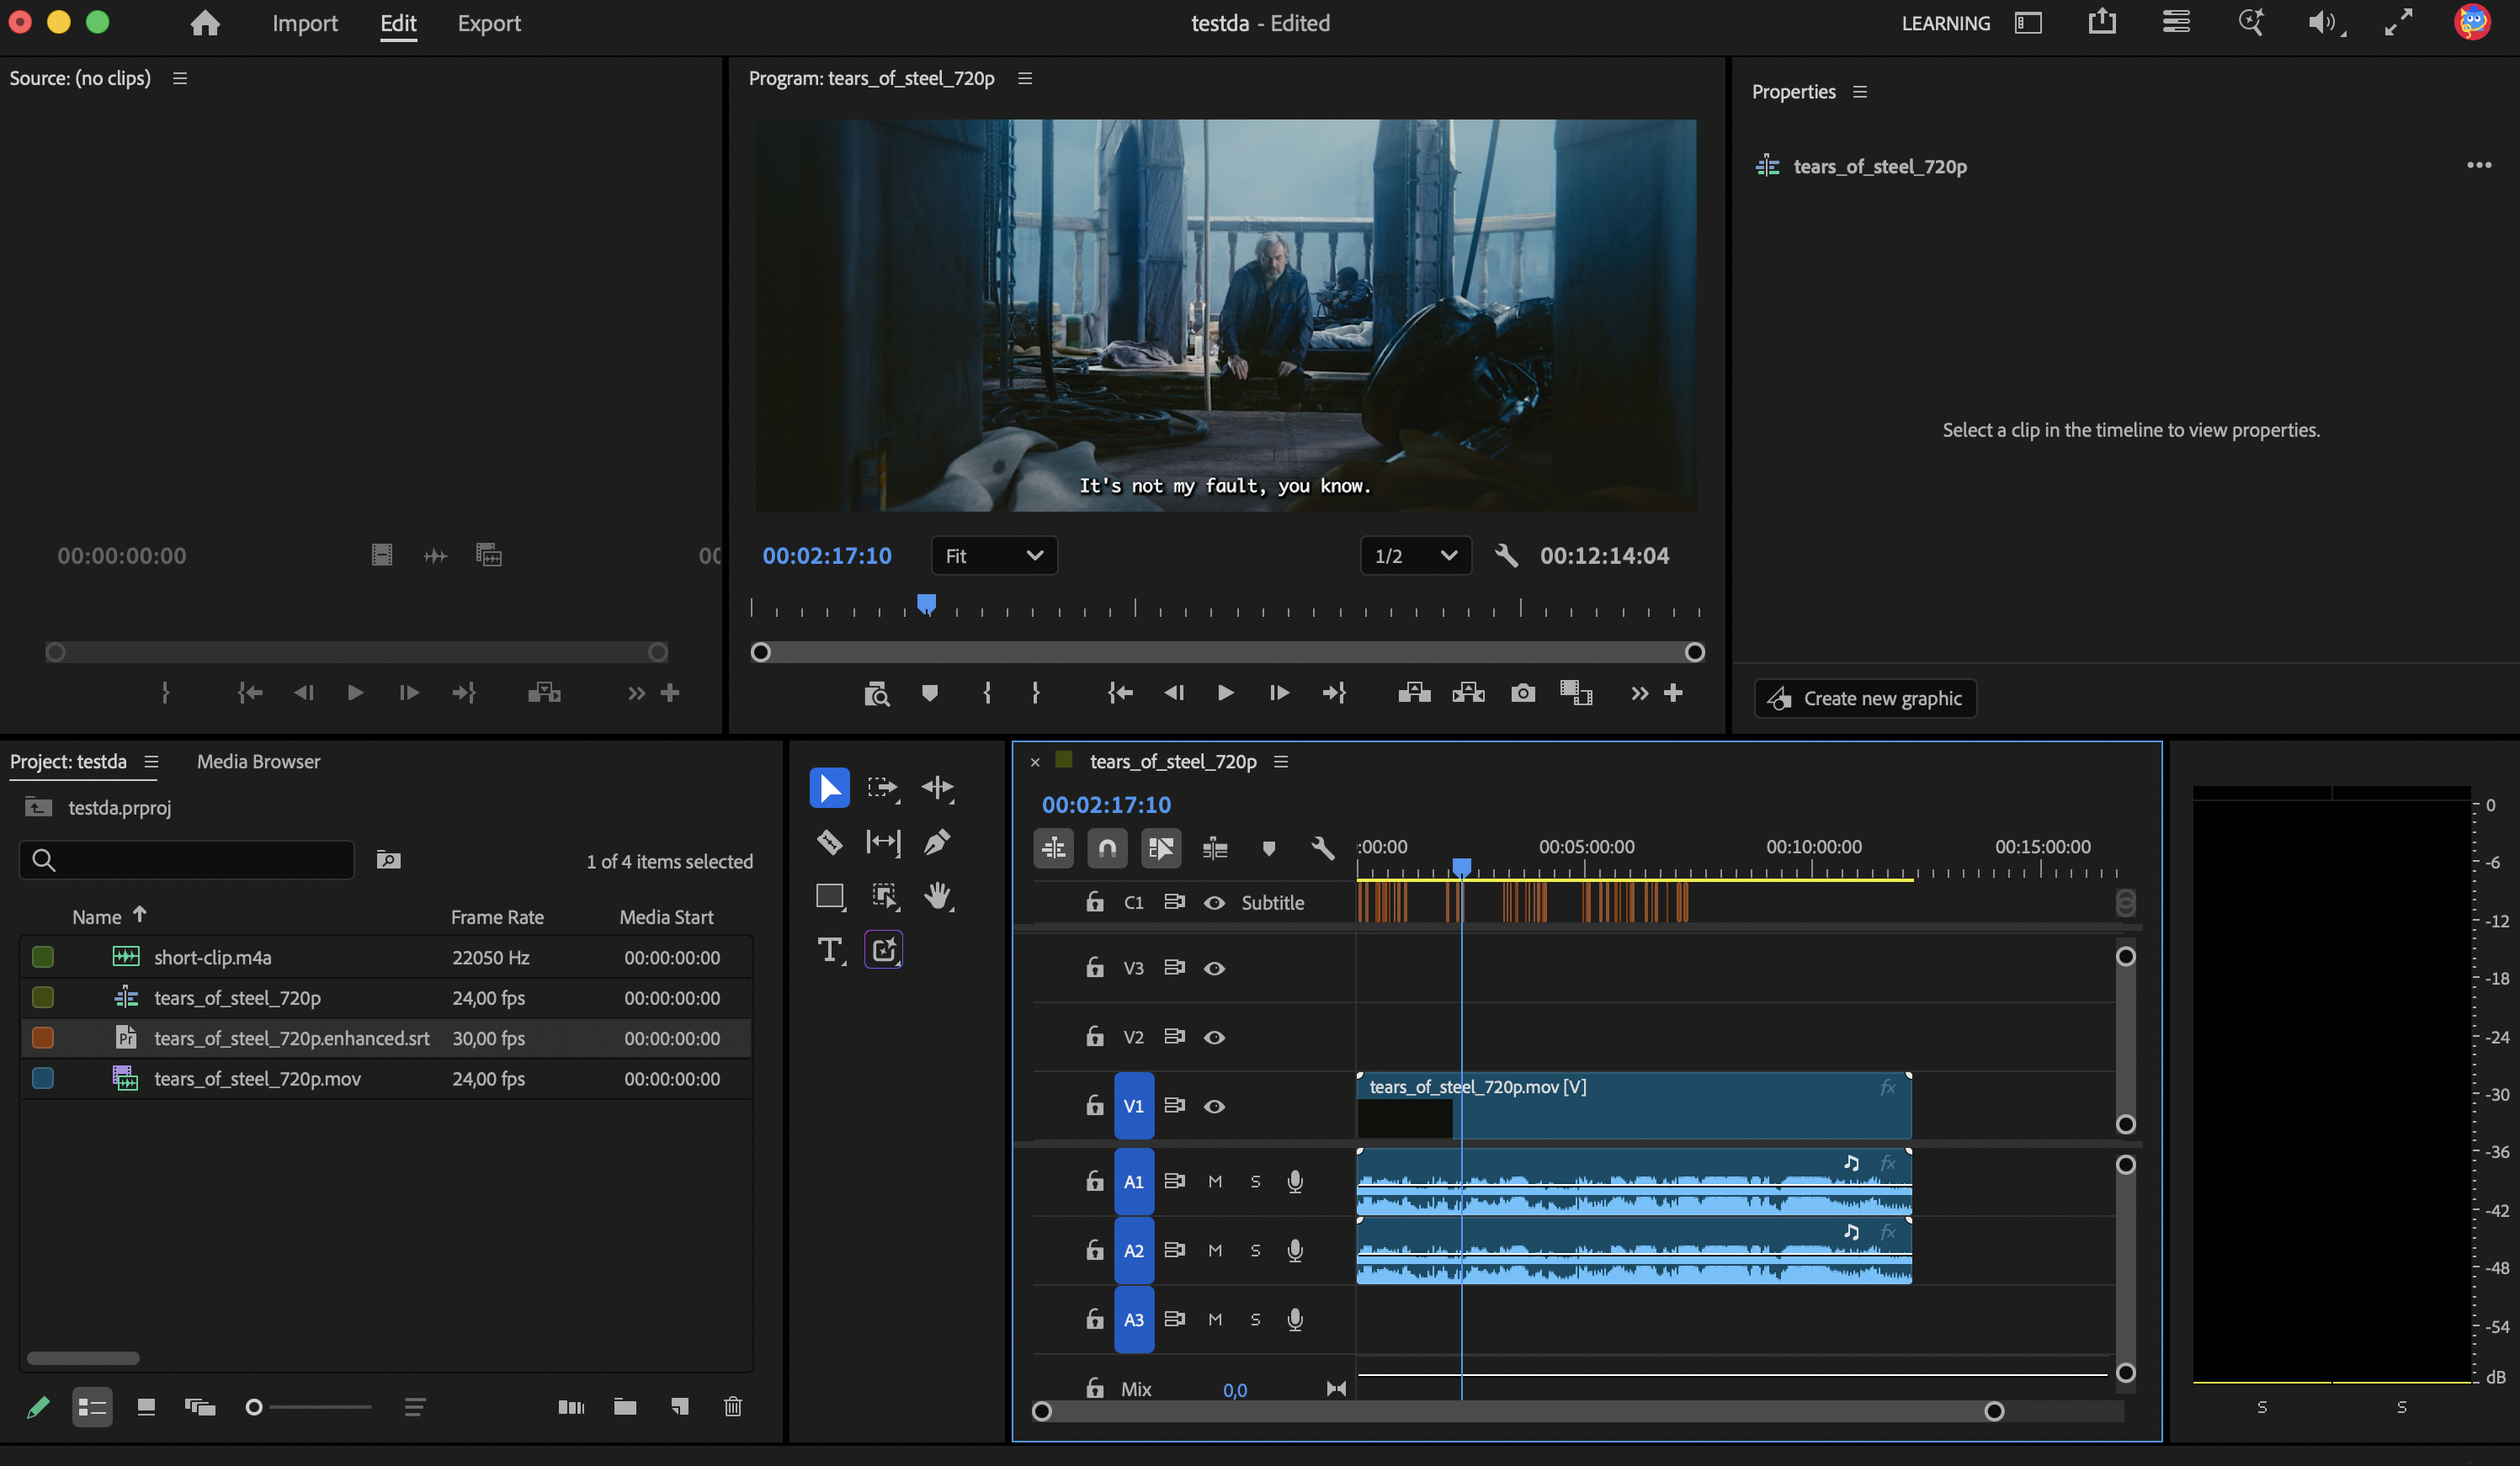
When the panel says Captions added, the subtitles are in your project. The subtitle file lands in the Project panel, named after the sequence, for example Interview.enhanced.srt, and the panel places it on your sequence as a caption track.
If your version of Premiere Pro does not let the panel create the track, drag the file from the Project panel onto the sequence and Premiere Pro creates it for you. From there you style the captions with Premiere Pro's own caption tools, just like captions you made yourself.
Translating your subtitles
Step 10. Use the Translation tab
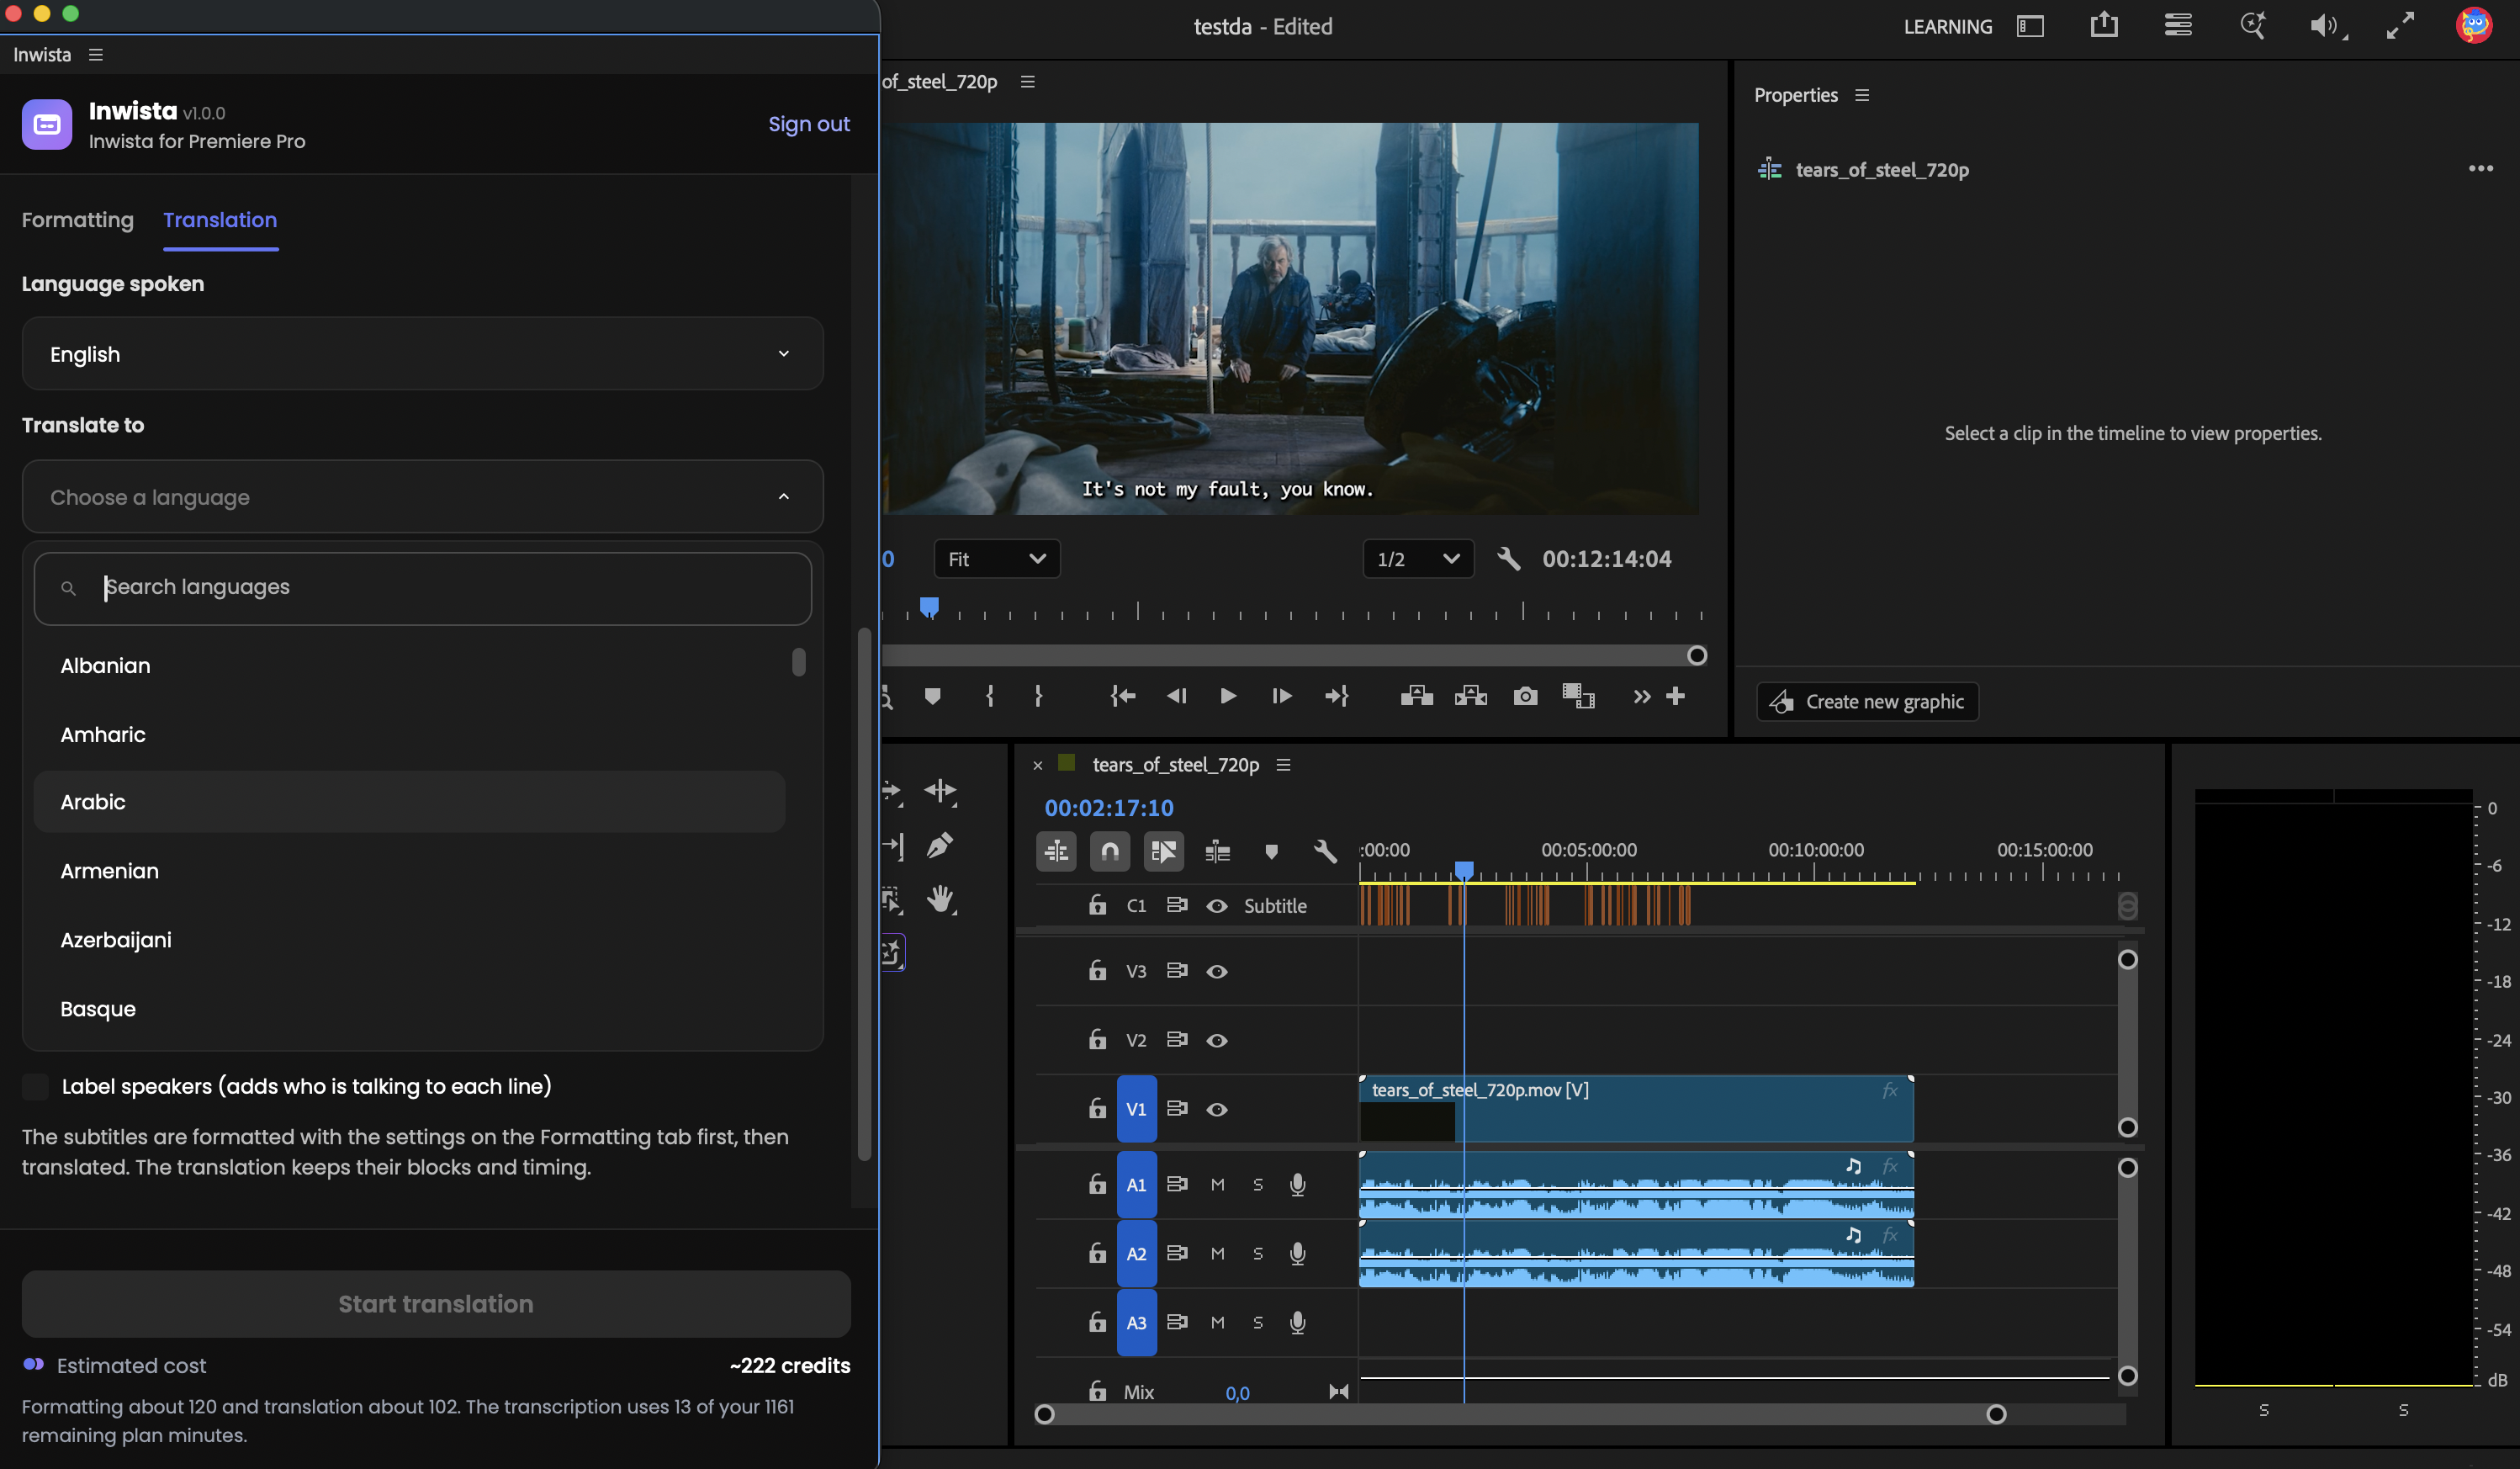
To get the subtitles in another language, switch to the Translation tab and choose a language under Translate to. Then click Start translation.
The panel formats the subtitles with your settings from the Formatting tab first and then translates them, so the translation keeps the same subtitle blocks and timing as the original. The file is named after the language, for example Interview.translated-es.srt for Spanish.
Each run gives you one language. For another language, run the sequence again with a new target, or open the project in Inwista and translate it there. Our guide to subtitles in multiple languages covers that workflow.
What a run costs
The plugin itself is free. When you signed in with a code, the transcription is paid from your plan's minutes. Formatting and translation use AI credits, and the panel shows an estimate below the Start button before you begin.
If a sequence is longer than the minutes you have left, the panel tells you before you start and offers to pay for that run with AI credits instead. It shows the cost and your balance first, and nothing is charged unless you confirm. Current plans are on the pricing page.
Fine tune the text in Inwista
Want to correct a name or a word? Click Edit in Inwista in the panel. It opens the transcript in the Inwista editor in your browser, where you can fix the text, translate into more languages and export other formats. Every sequence you send from Premiere Pro also appears in your project list there. Take a look at our tour of the editor to see what you can do.
If something doesn't work
- No sequence open. Click into the timeline you want and press Refresh.
- The code expired or was already used. Click Sign in with Inwista again for a new one.
- The captions are not on the timeline. Drag the .srt file from the Project panel onto the sequence.
- The panel is blank. Close it, open it again from the Window menu, and restart Premiere Pro if that doesn't help.
The help center guide has the full troubleshooting list.
Try it on your next edit
The plugin is free, and the Free plan includes 45 minutes of transcription every month.
Get Inwista for Premiere Pro on Adobe Exchange →
Frequently asked questions
Is the plugin free? Yes. You need an Inwista account, and the Free plan includes 45 minutes of transcription a month with no card required.
Which versions of Premiere Pro does it work with? Premiere Pro 25.6 or later, on both macOS and Windows.
How is this different from Speech to Text in Premiere Pro? Inwista adds subtitles in 70+ languages, including Finnish, Icelandic and Norwegian Nynorsk, formatting that follows broadcast rules such as 42 characters per line, and translation into another language in the same run.
Where is my audio processed? On Inwista's own servers in the EU. The panel only sends the audio of your sequence, and the temporary audio file is deleted from your computer as soon as the upload is accepted.
Do I need to be an administrator? Only to approve the connection. A team member can start signing in and send the code to the workspace owner to approve.
Can I style the captions my own way? Yes. The captions arrive as a normal caption track, so you style them with Premiere Pro's own caption tools.
Can I translate into several languages? One language per run. Run the sequence again for each language, or translate the project into more languages in the Inwista editor.
The screenshots show Tears of Steel, (CC) Blender Foundation, mango.blender.org, licensed under CC BY 3.0.